In general, when using the Evident product, you should use templates to create requests. If you don't know why you should use templates, read this article.
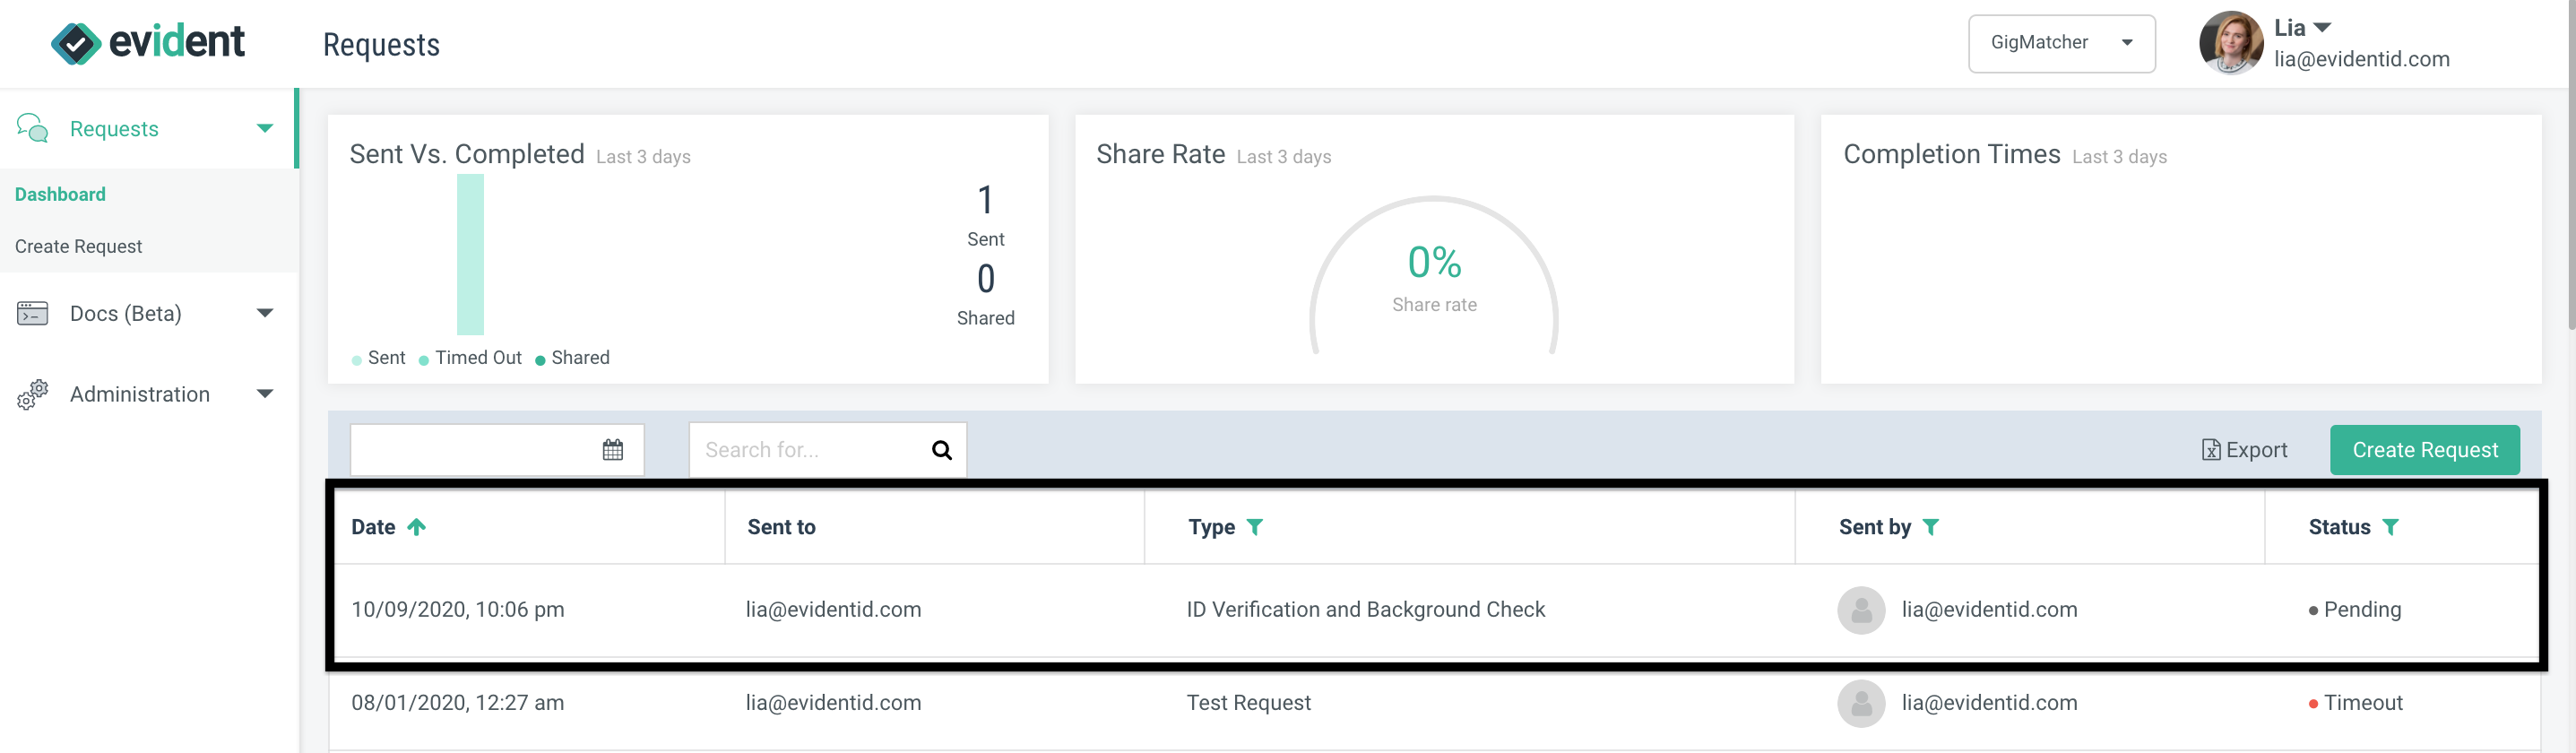
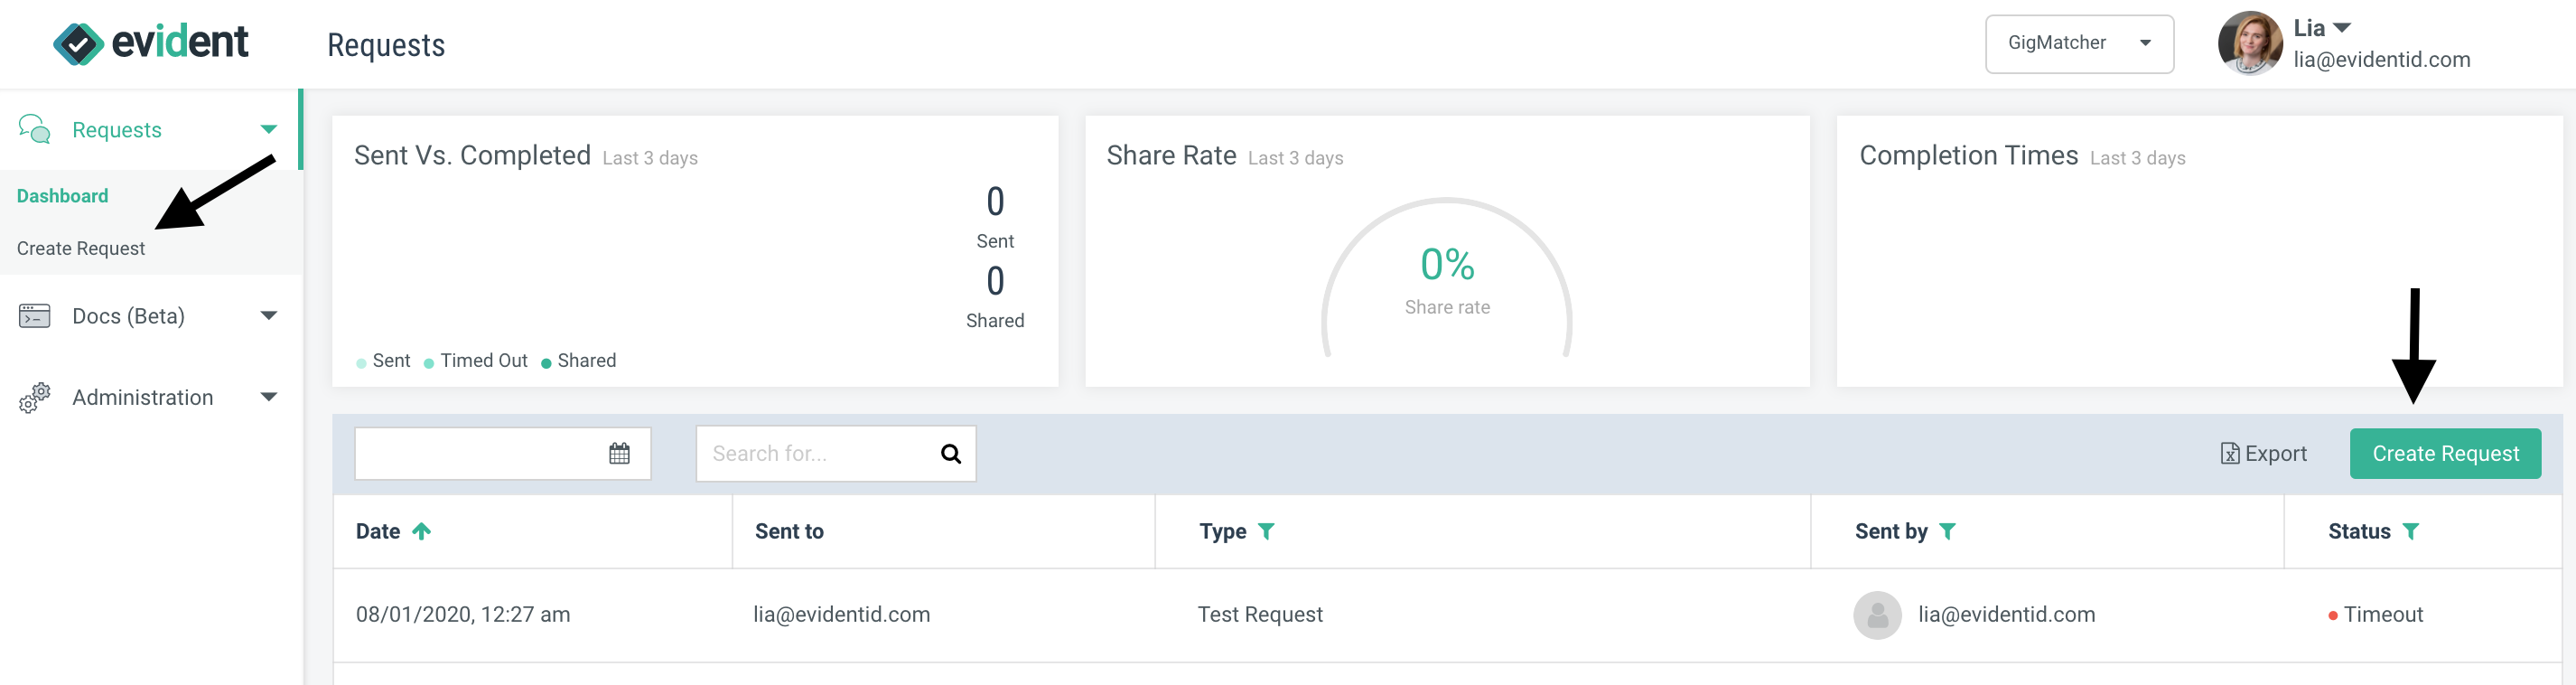
To use a template, first log-in to the Evident platform. Once you've arrived at the Dashboard, navigate to the Request Creation page. You can do so by clicking the buttons that say "Create Request" on the right and left hand side of the Dashboard.
Once you arrive on the Request Creation page, you'll see a menu available at the top that says "My Templates."
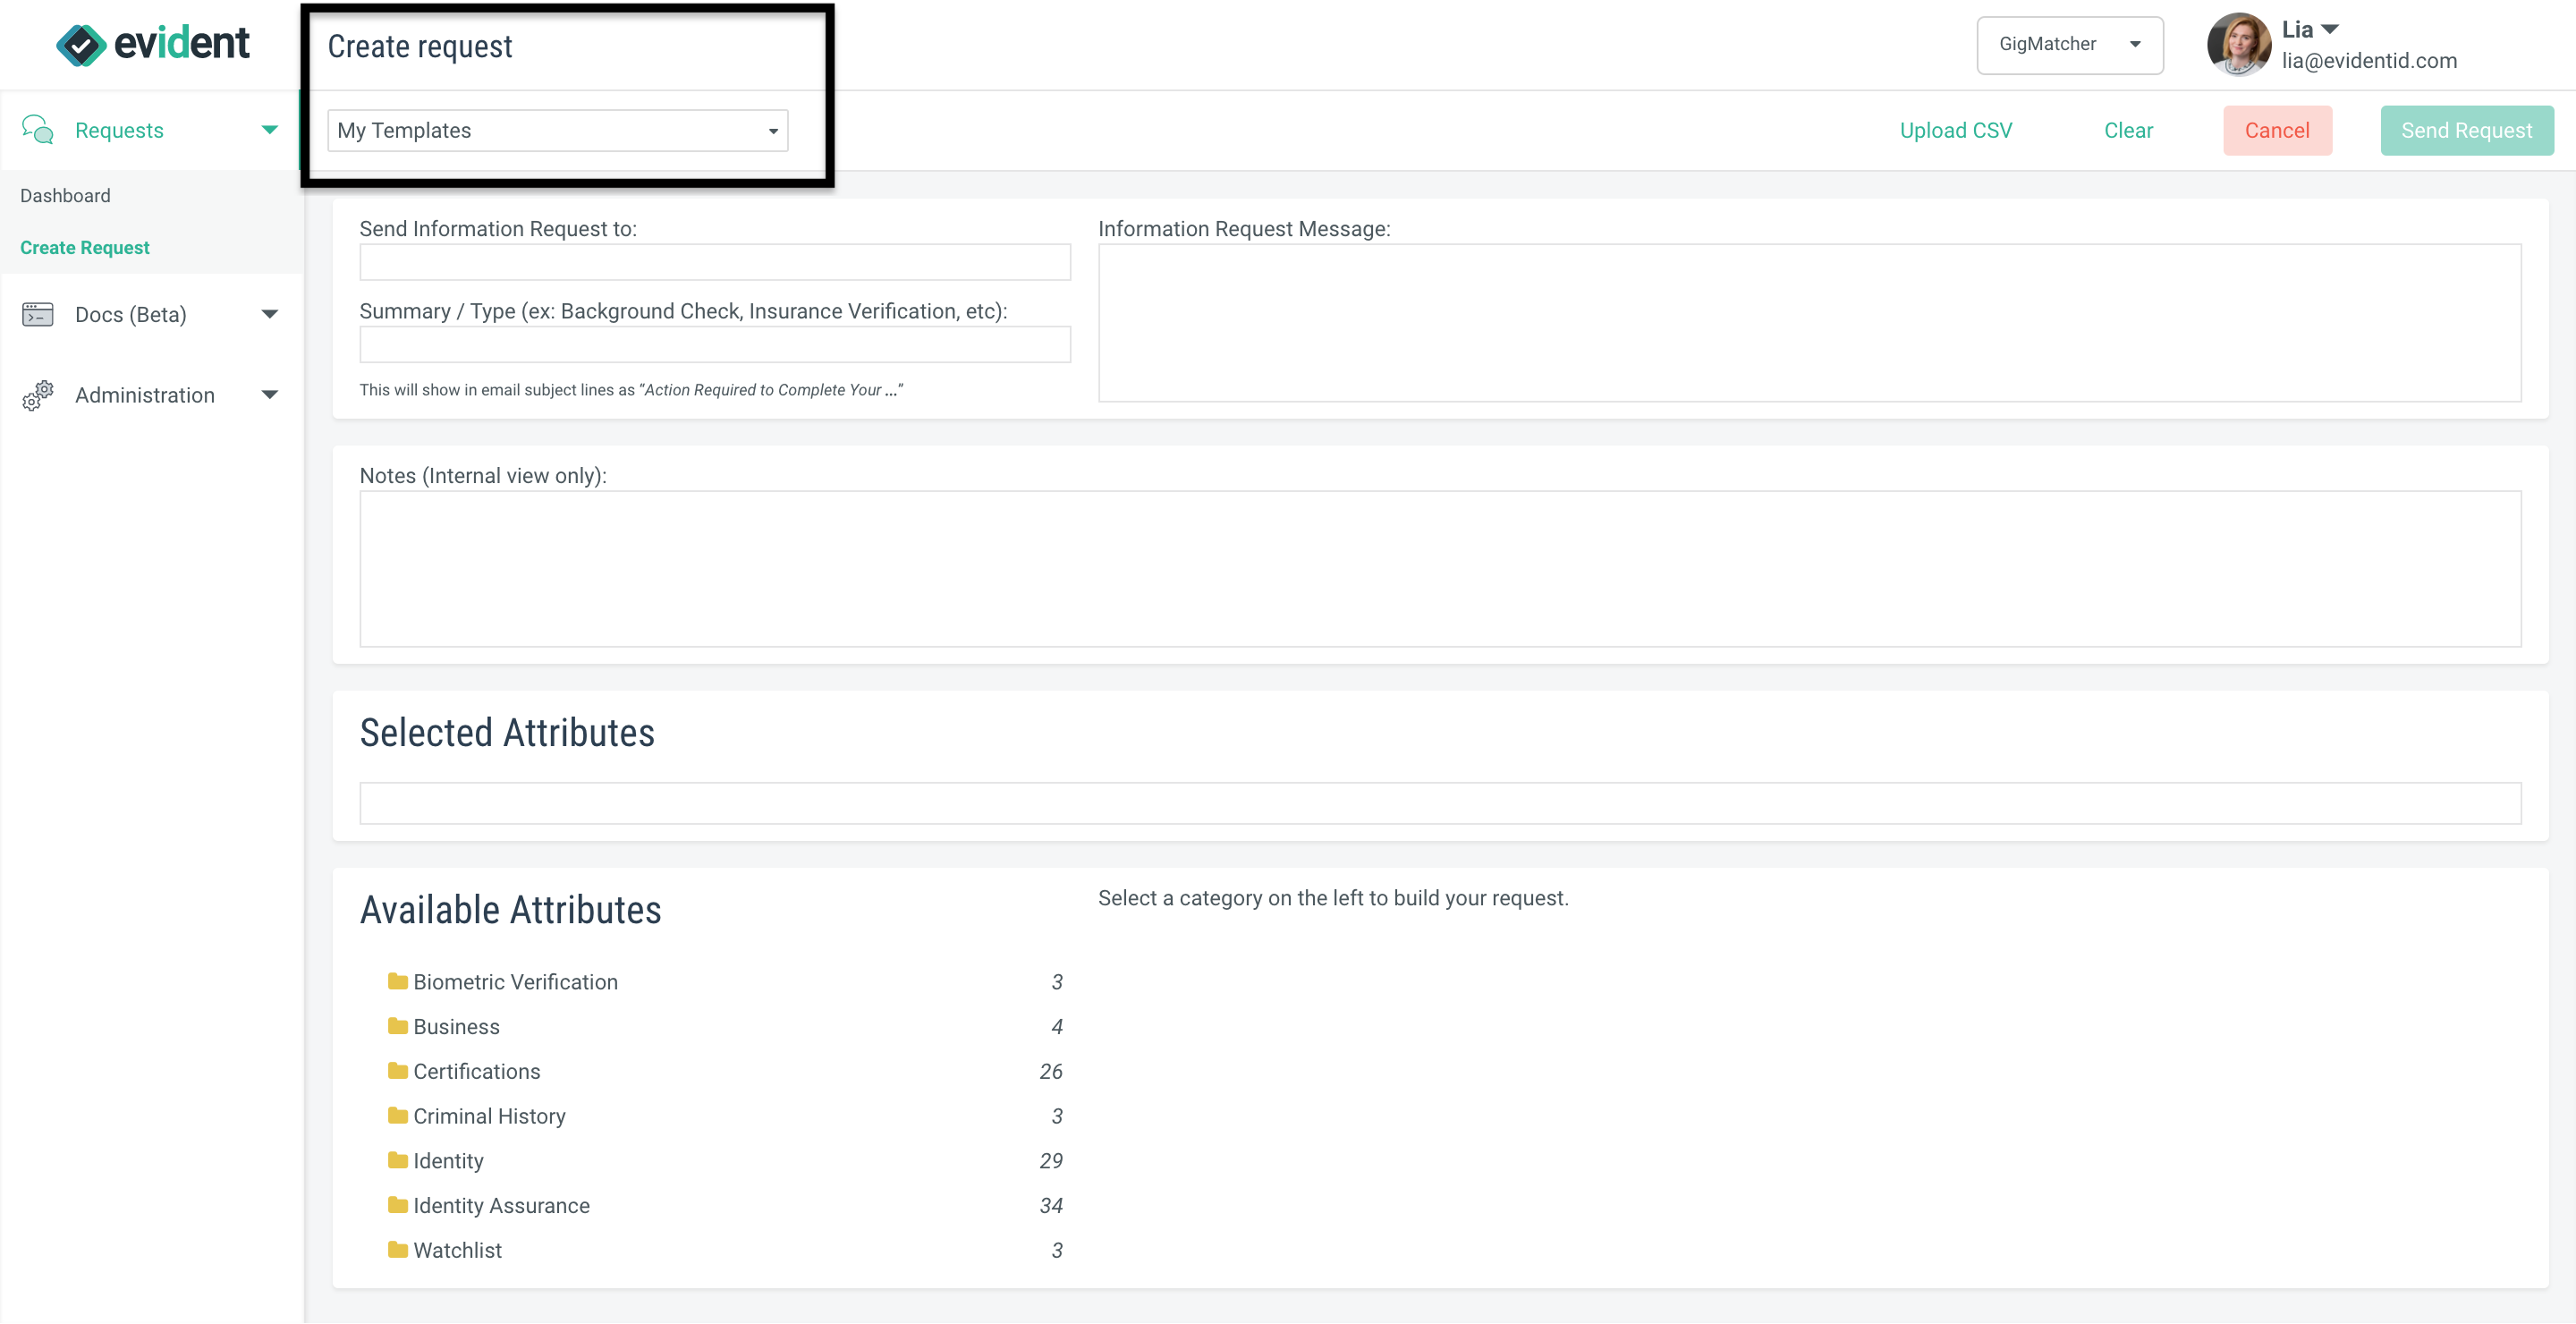
Clicking on this menu will show you all the templates that you have configured for your account.
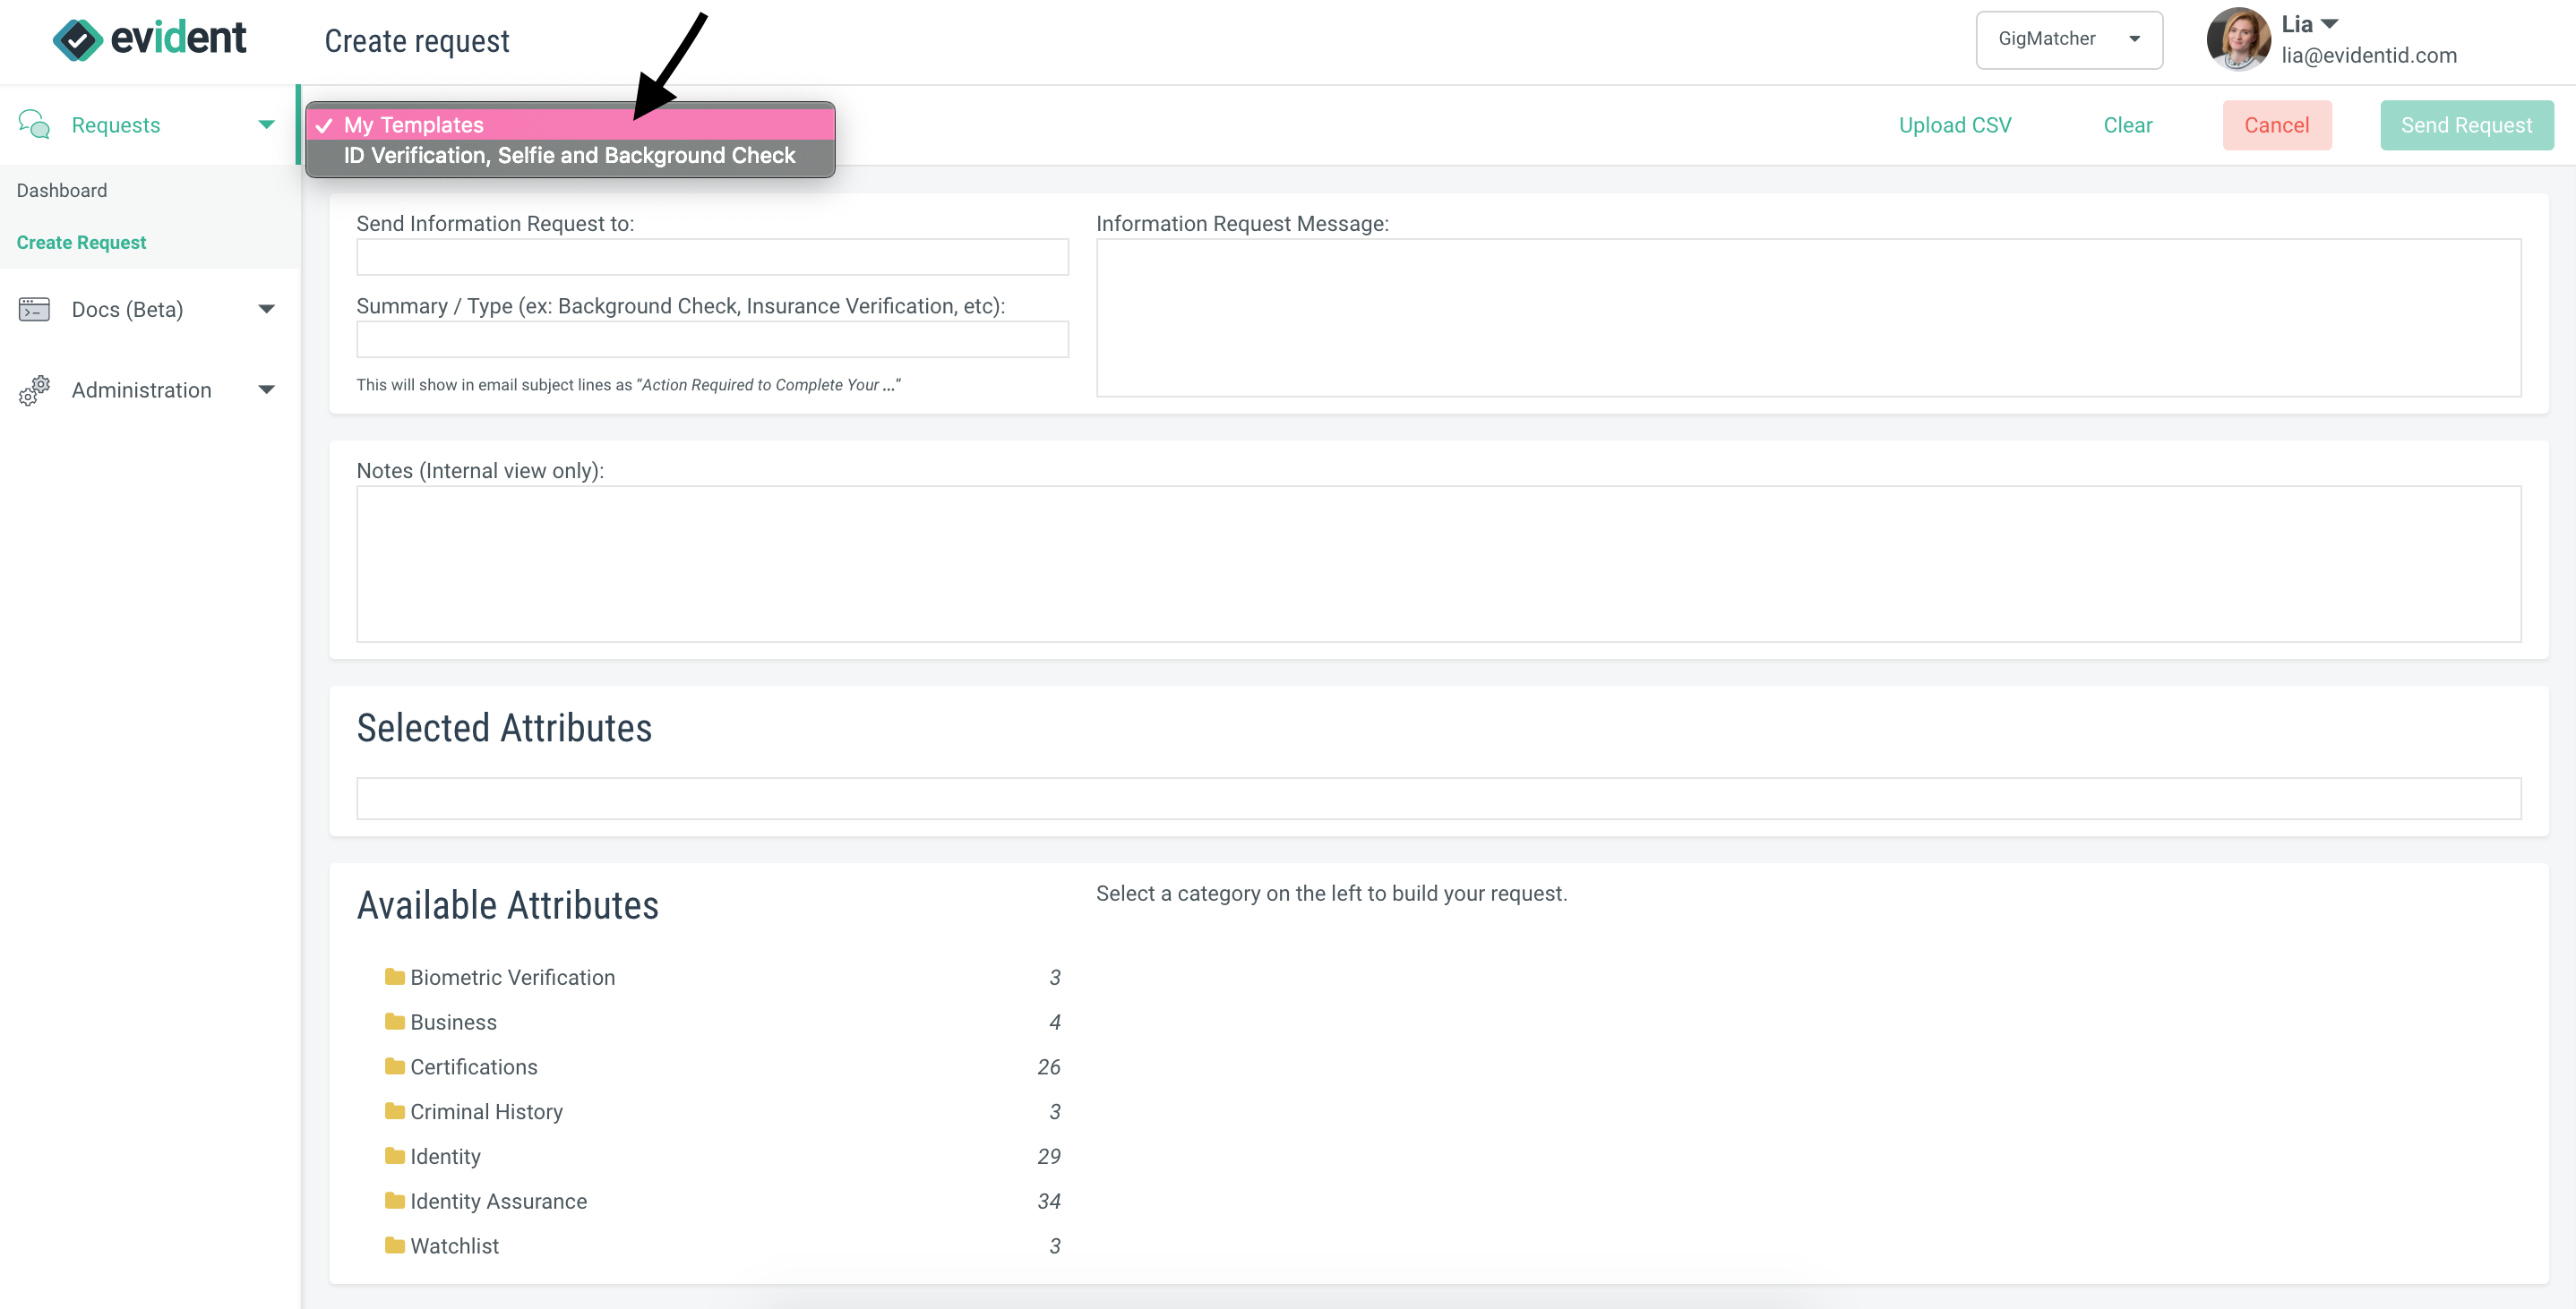
Select the template you want to use. Once you've selected your template, you'll see the template information show up in the subject line for the email, body of the email and selected attributes for the request.

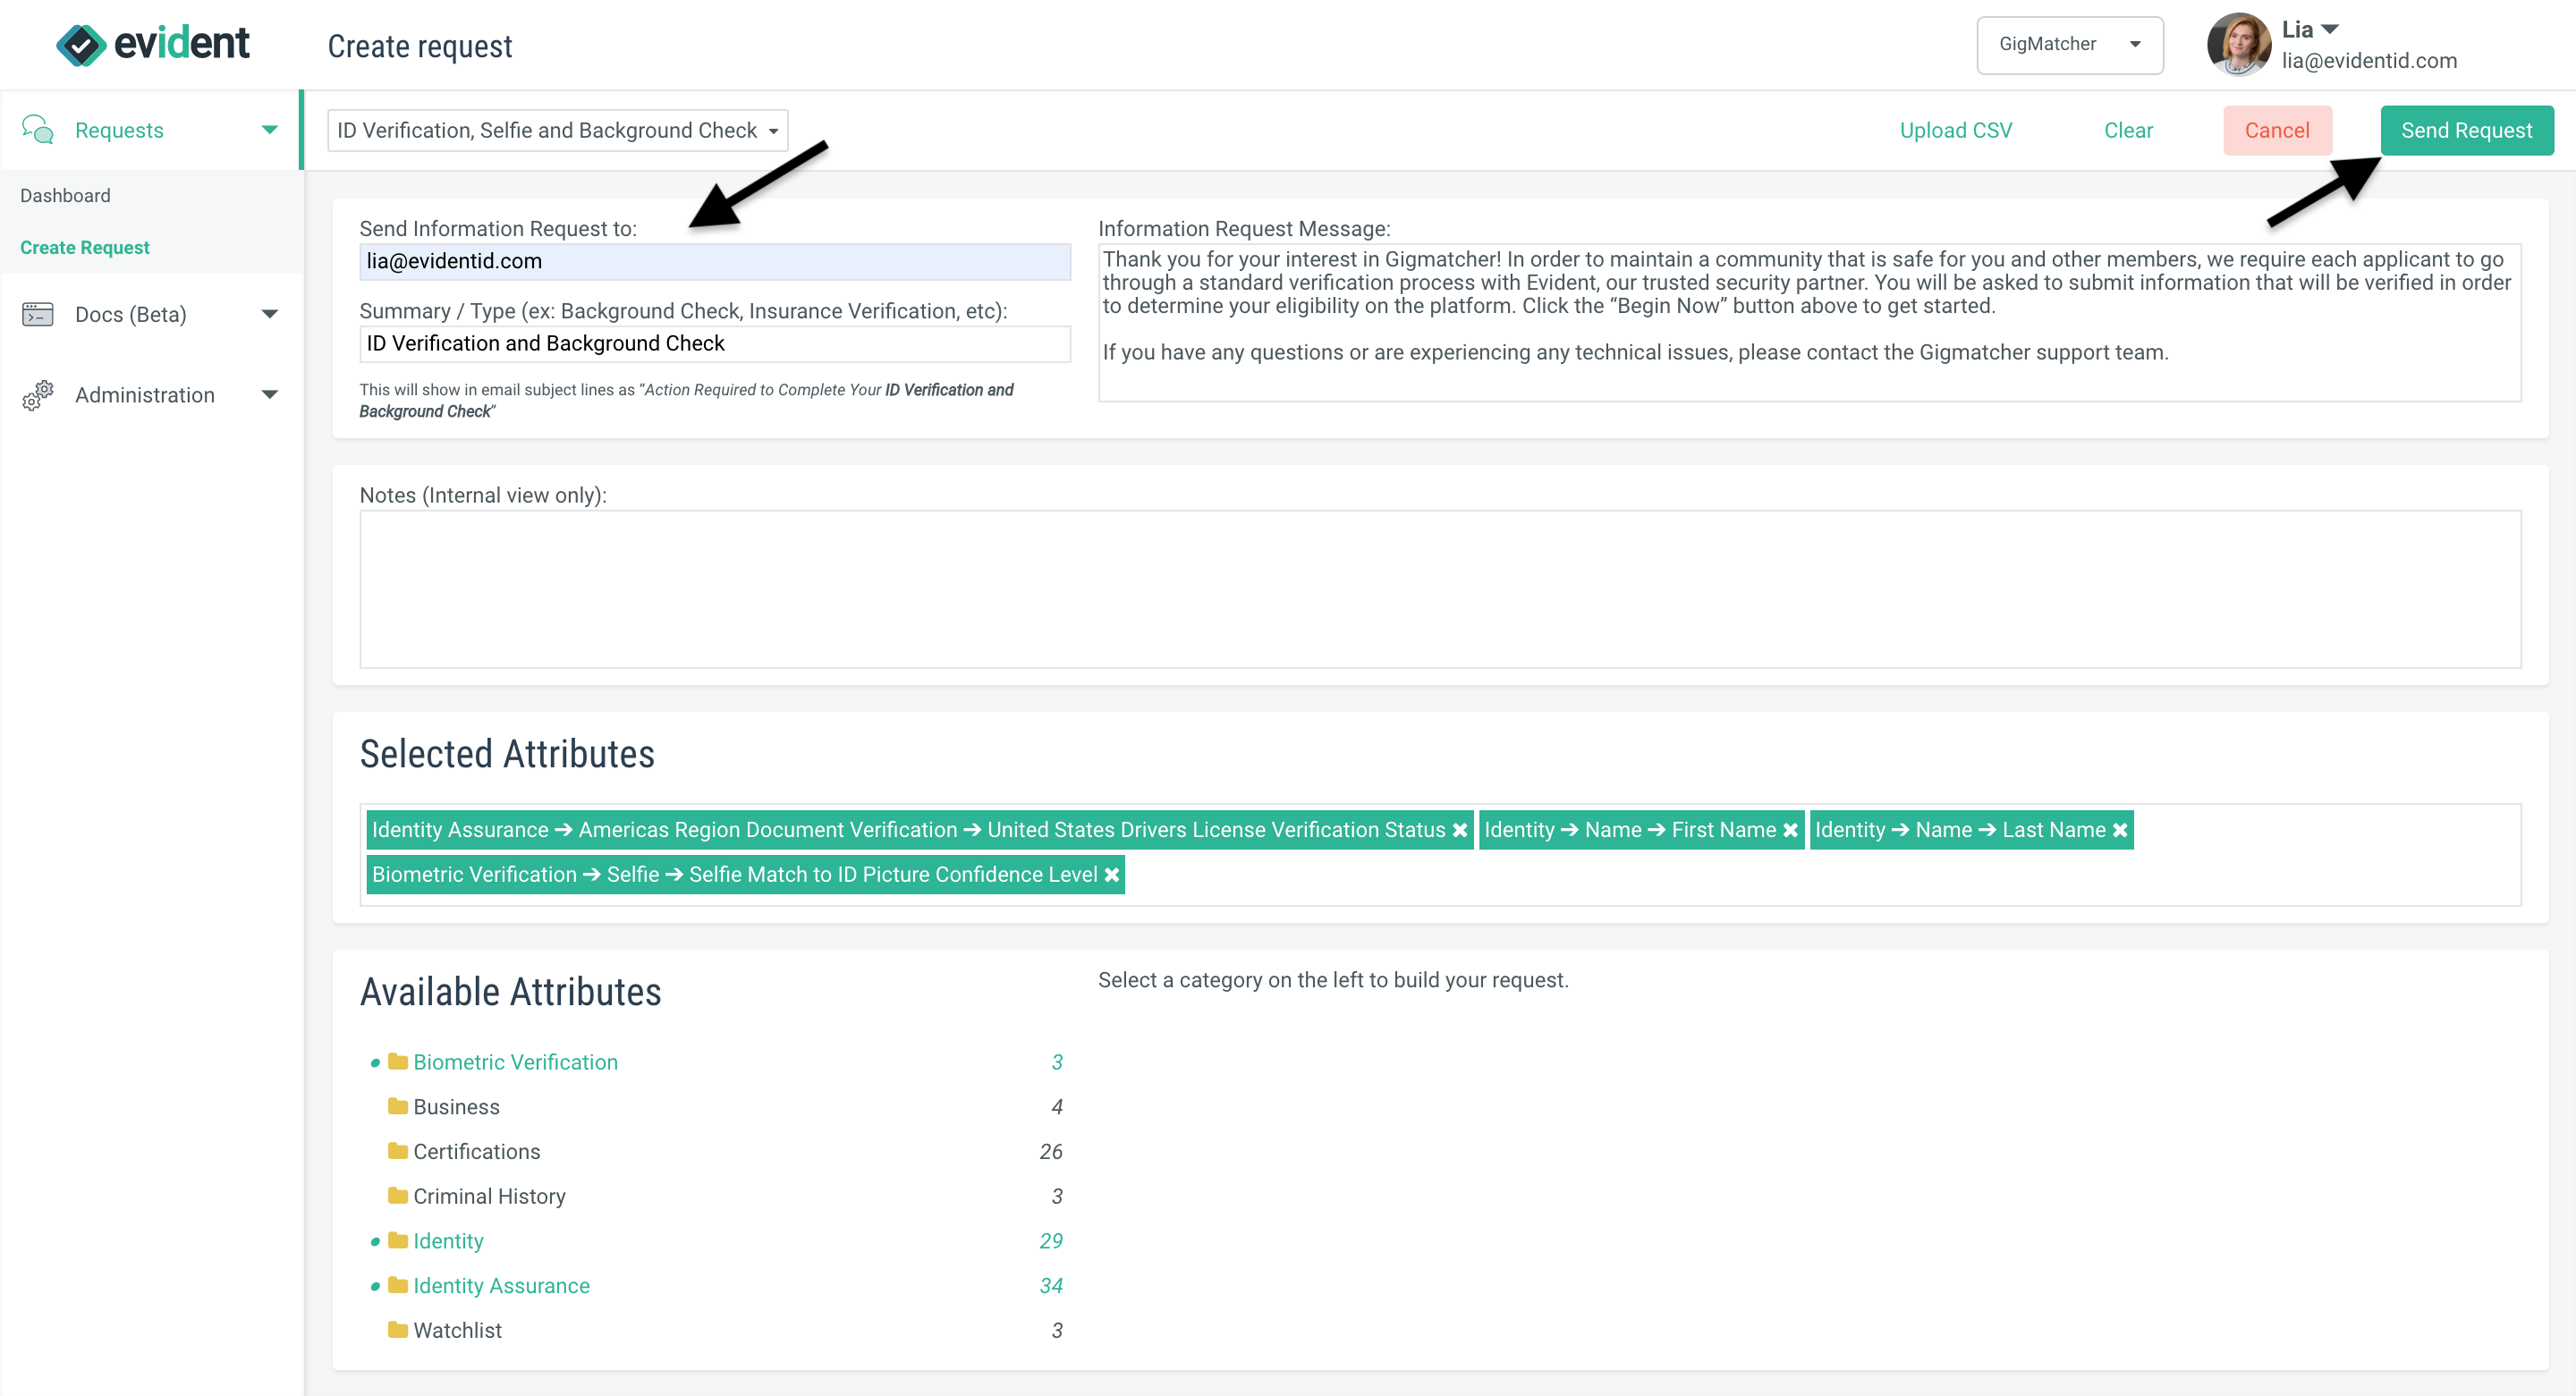
Above, we've chosen to select the ID Verification, Selfie and Background Check template.
Finally, add the email address of the individual that you want to receive the request. You can do this in the bar labeled "Send Information Request to." Once you input the email address of your user here, the button on the far right that says "Send Request" will become usable.
When you click this button, you will automatically be taken back to the Dashboard, where you can see the request you've created.