
Attributes are a fundamental component of the Evident platform, and having a basic understanding of them will help you understand the next basic component, requests.
When you request that Evident to run a verification on your behalf, we reach out to the user and collect information from them. Then, we connect to the authoritative source and ultimately turn results over to you.
Here's what that process looks like:
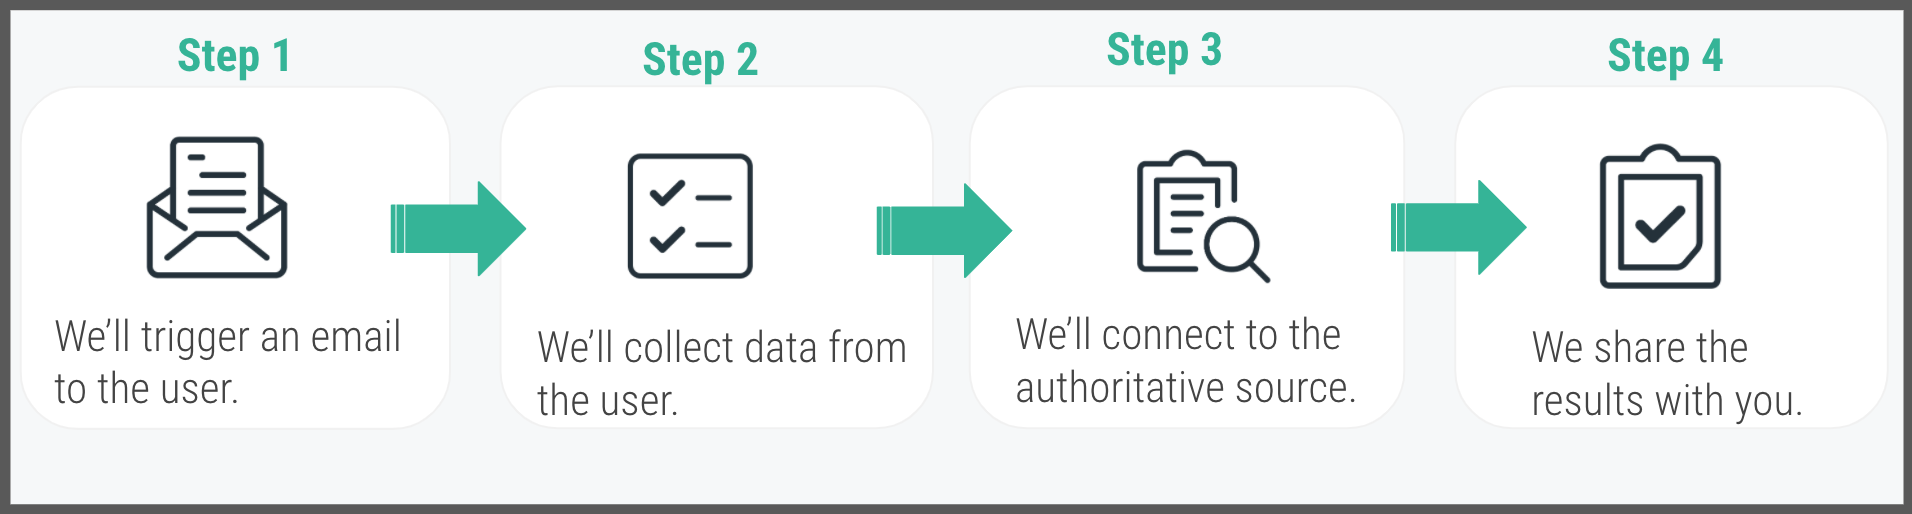
These results that we share with you in Step 4 are in the form of attributes, or encrypted pieces of information that we've determined that you might want to view. If you've never heard the term attributes and don't understand how this relates to the Evident product, you can read about Evident's data model and learn what an attribute is here.
Now, let’s talk about the email that goes out to the user to collect their information as it was just mentioned.
This corresponds to Step #1 in the above diagram. The mechanism for triggering the email that contains the correct forms for the user to fill out is called a request.
- A request is either a single verification or a group of verifications. By default, a request always sends out an associated email.
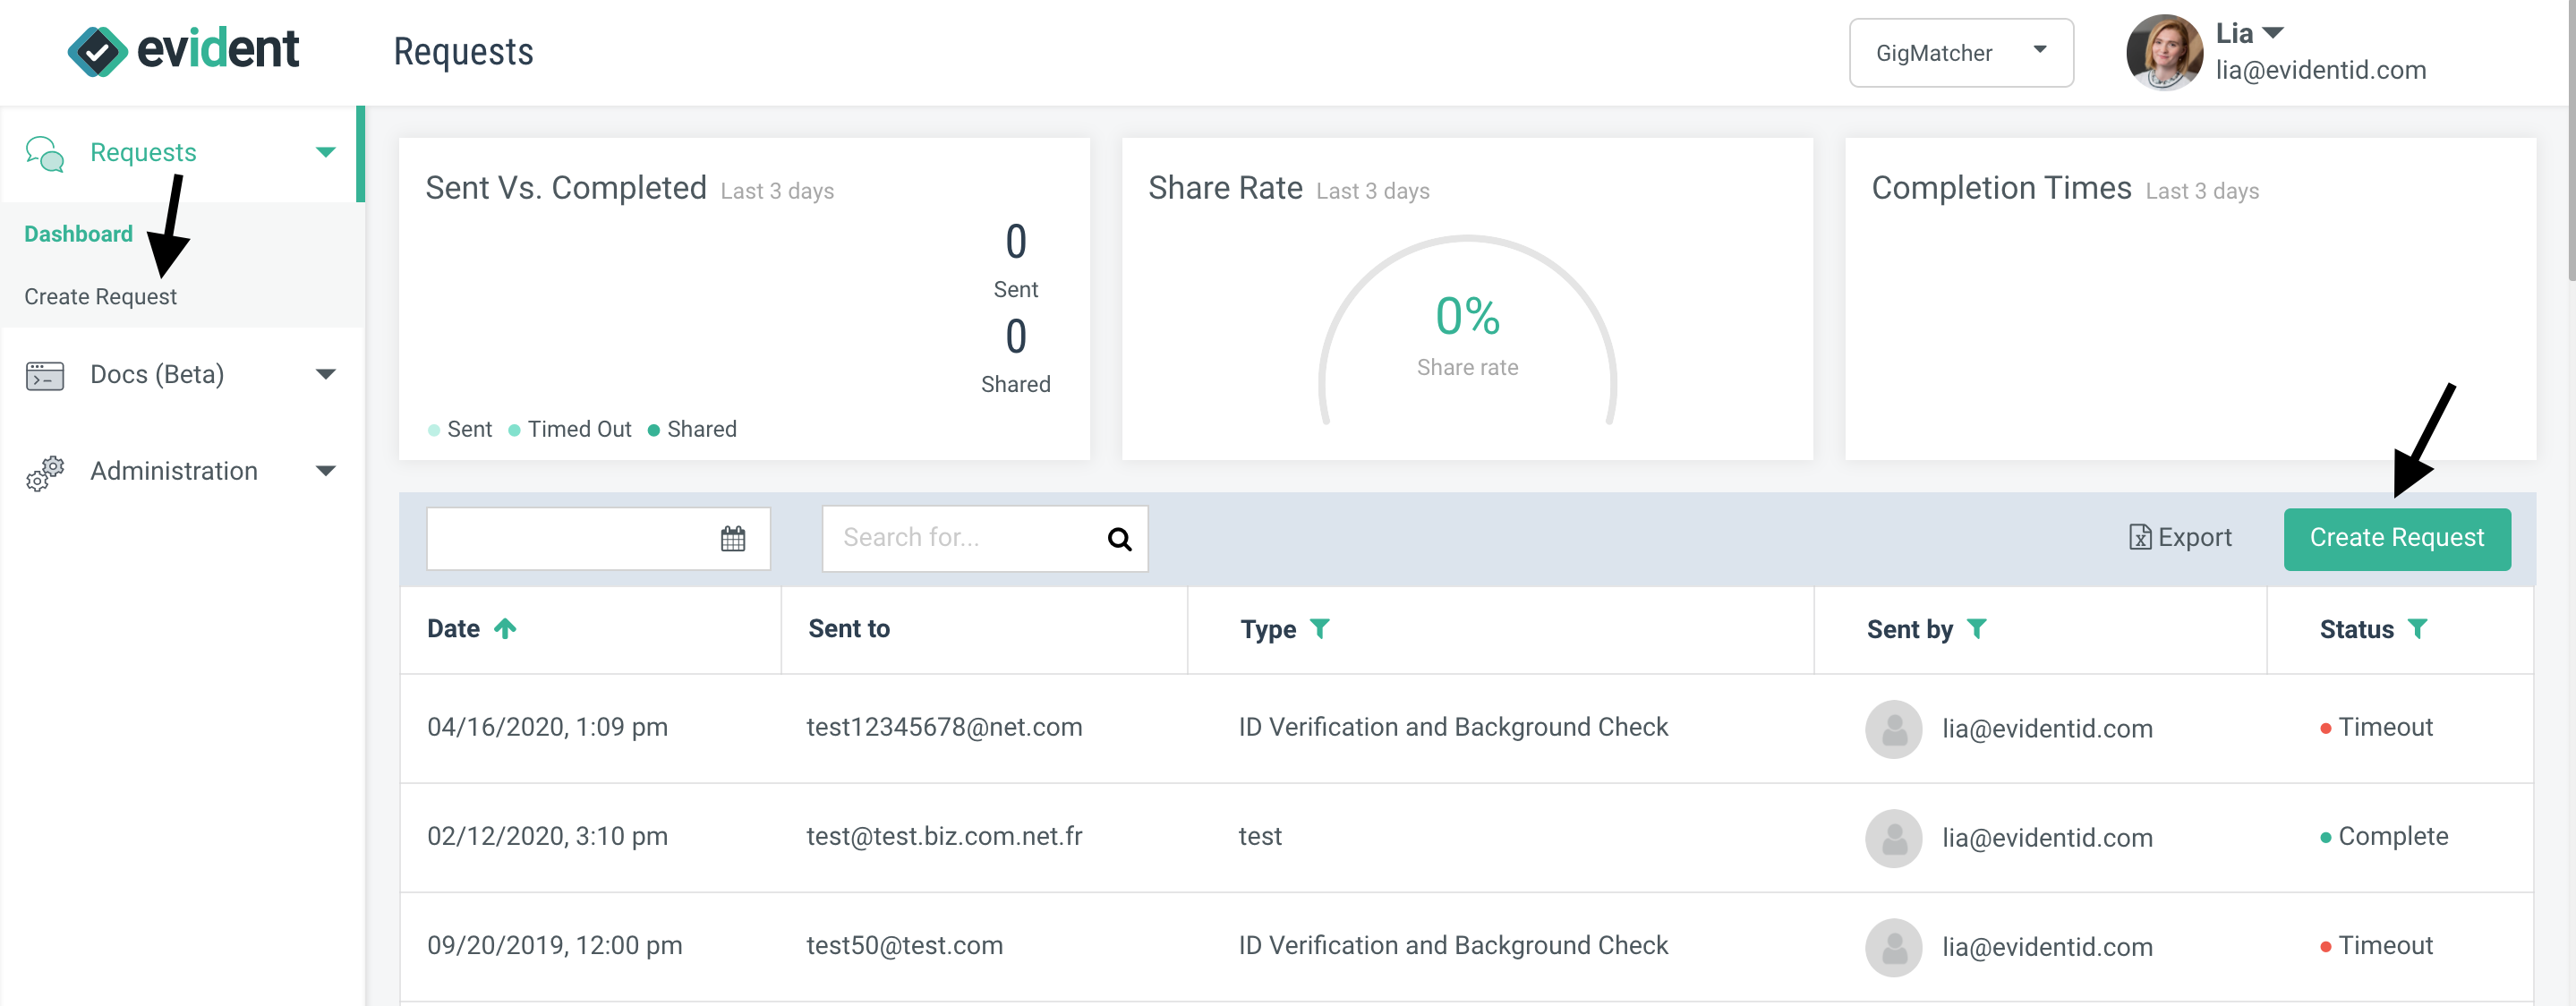
You can create a request by clicking on the Create Request button on the left-hand or right-hand side of the page (see arrows below). Because a request is always associated with an email, many of its components mirror the components of an email, like a subject and a body.
________________________________________________________________________________________________________
When you click either of the Create Request buttons listed, you will be taken to the Request Creation screen (see screenshot below). You can see that this is the request creation screen because it says Create request at the top of the screen (see arrow on the left) and there is a Send Request button on the right-hand side of the screen (see arrow).

_______________________________________________________________________________________________________
This screenshot below shows a request that is being created for a massage license verification. This is called the massage license verification attribute.

________________________________________________________________________________________________________
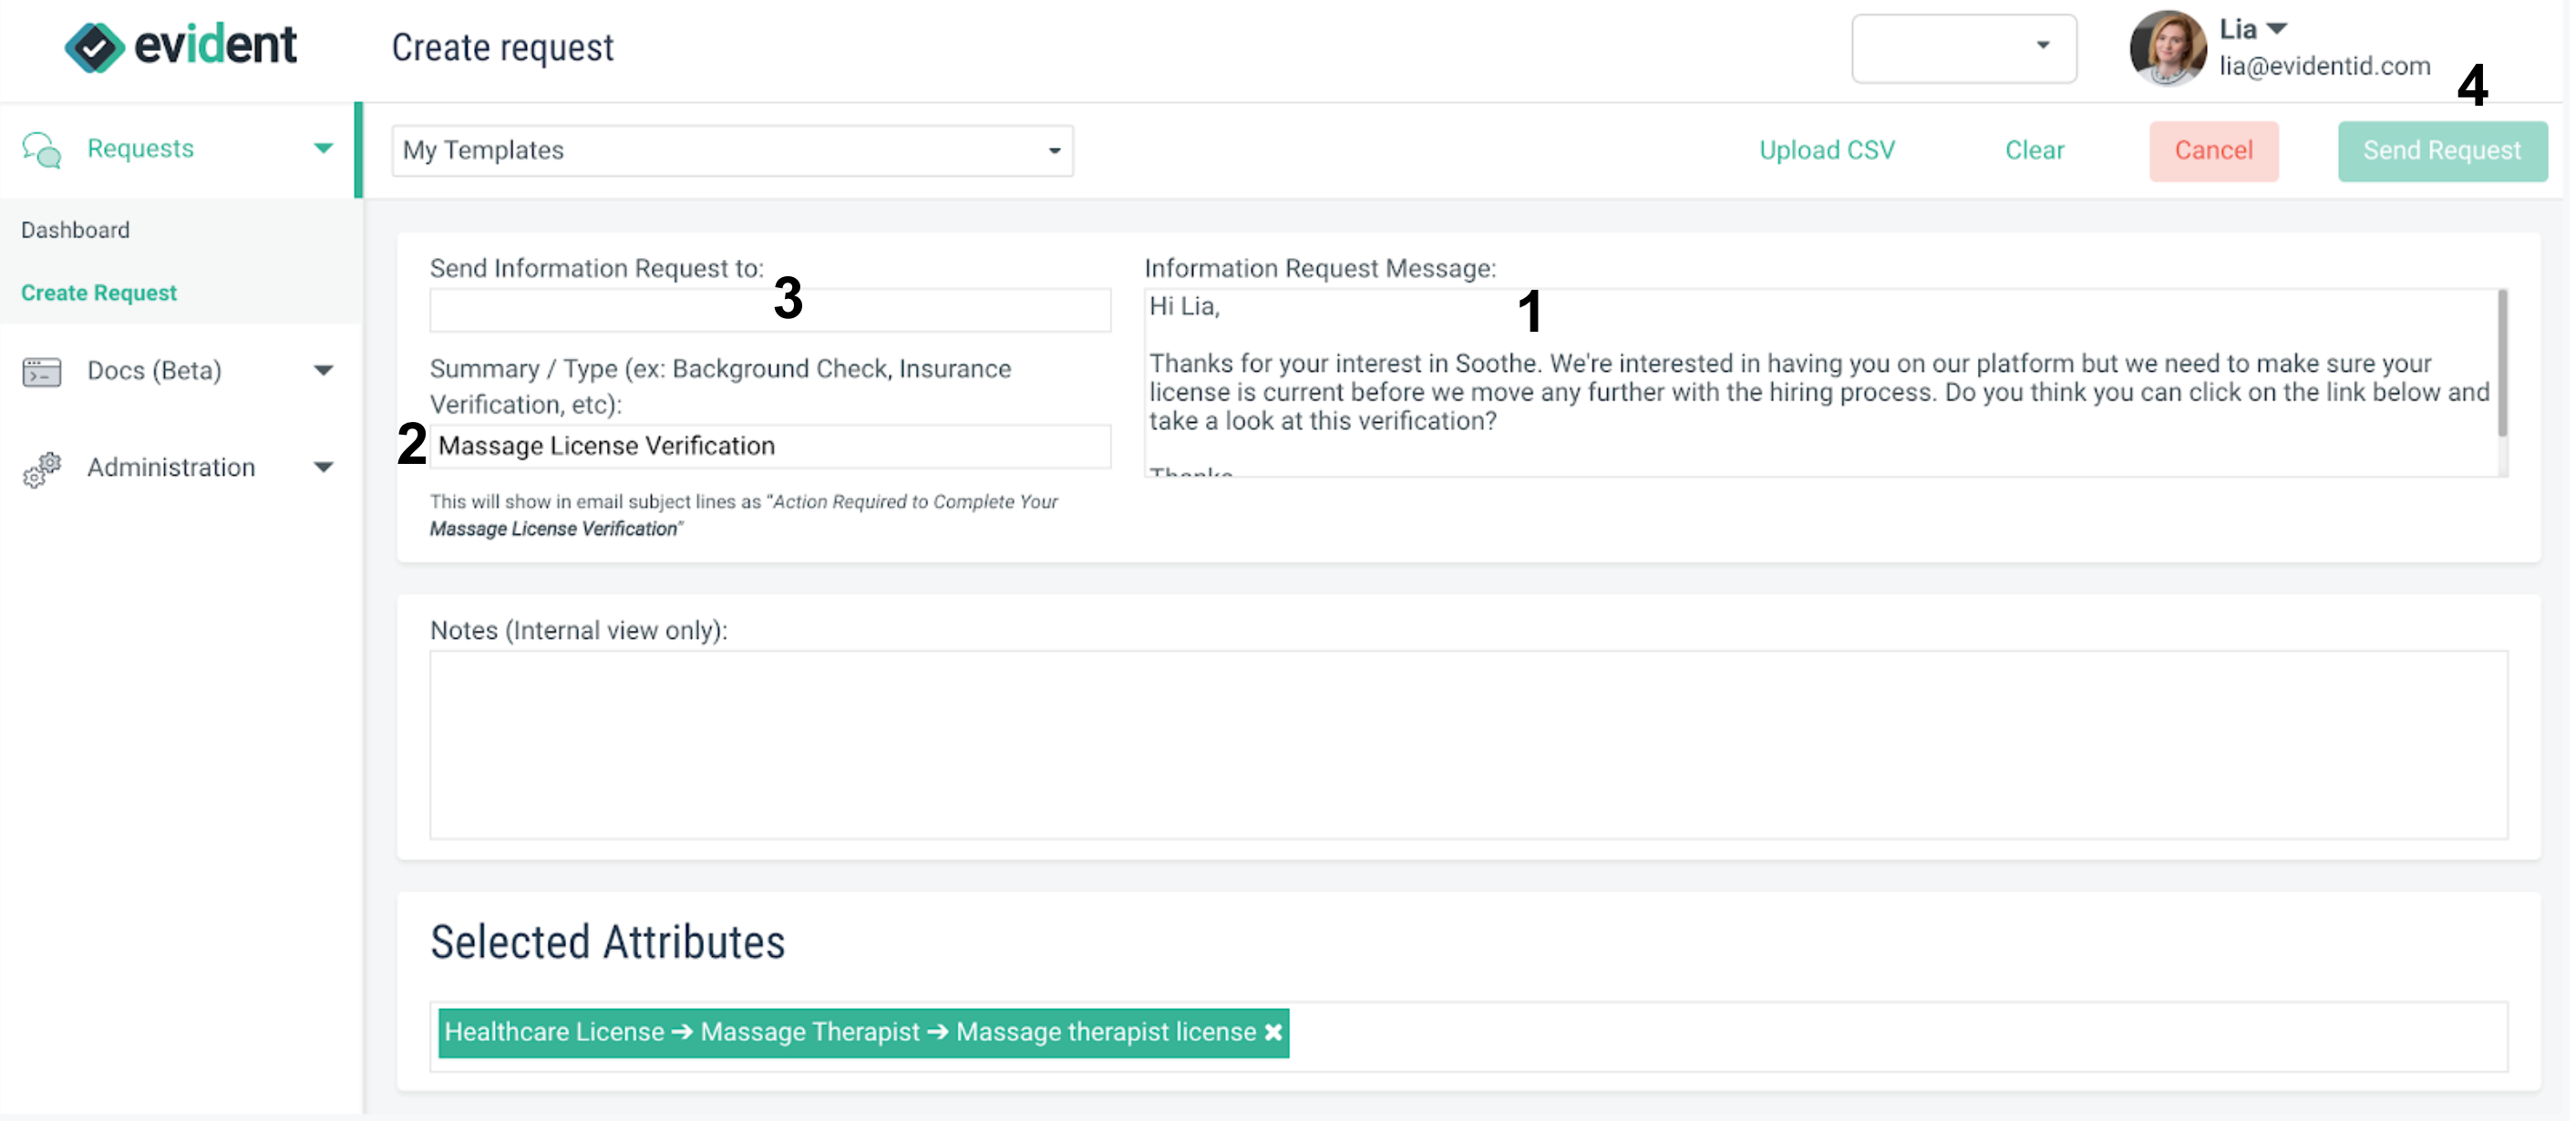
Now that you’ve added the desired verification to the request, let's take a look at some parts of the request that need to be filled out. Because a request is always associated with an email, many of its components mirror what an email looks like. See the list below and the associated numbers on the screenshot.
For example, there are the four (4) parts below:
- Information Request Message - This is an area to put the text that you want to go in the body of the email.
- Summary - The subject line for the email that gets sent out.
- Send Information Request to: The place where you’ll add the email address of the individual you want to receive the request email.
- Send Request - the button to send the request that can be clicked once the other three components have been included.
The fifth and final part is always the verification that you want to run. Continuing in the example from before, this request shows a massage license verification request is about to be created. You can tell it is for a massage license verification because of the massage license attribute contained in the request at the bottom. This means the requester is looking for the status of their applicant's massage license under "Selected Attributes."
_______________________________________________________________________________________________________
Once you click send, you'll be taken back to the dashboard - where you can see the created request here (see arrow).

_________________________________________________________________________________________________________
Now, if you go to your inbox, you can see that a request was created.

_________________________________________________________________________________________________________
If you click into that email to open it, you will see something that looks like the screen shot below. Note that the language that was in the information request message has now populated into the body of the email below. The colors of the button in the email and the logo at the top are customizable according to your branding preferences. Read more about how to update your branding here or you can also watch this video here.

________________________________________________________________________________________________________
If you click on this button in the email it will take you to the submission form page which looks like the screenshot below for massage license.

________________________________________________________________________________________________________
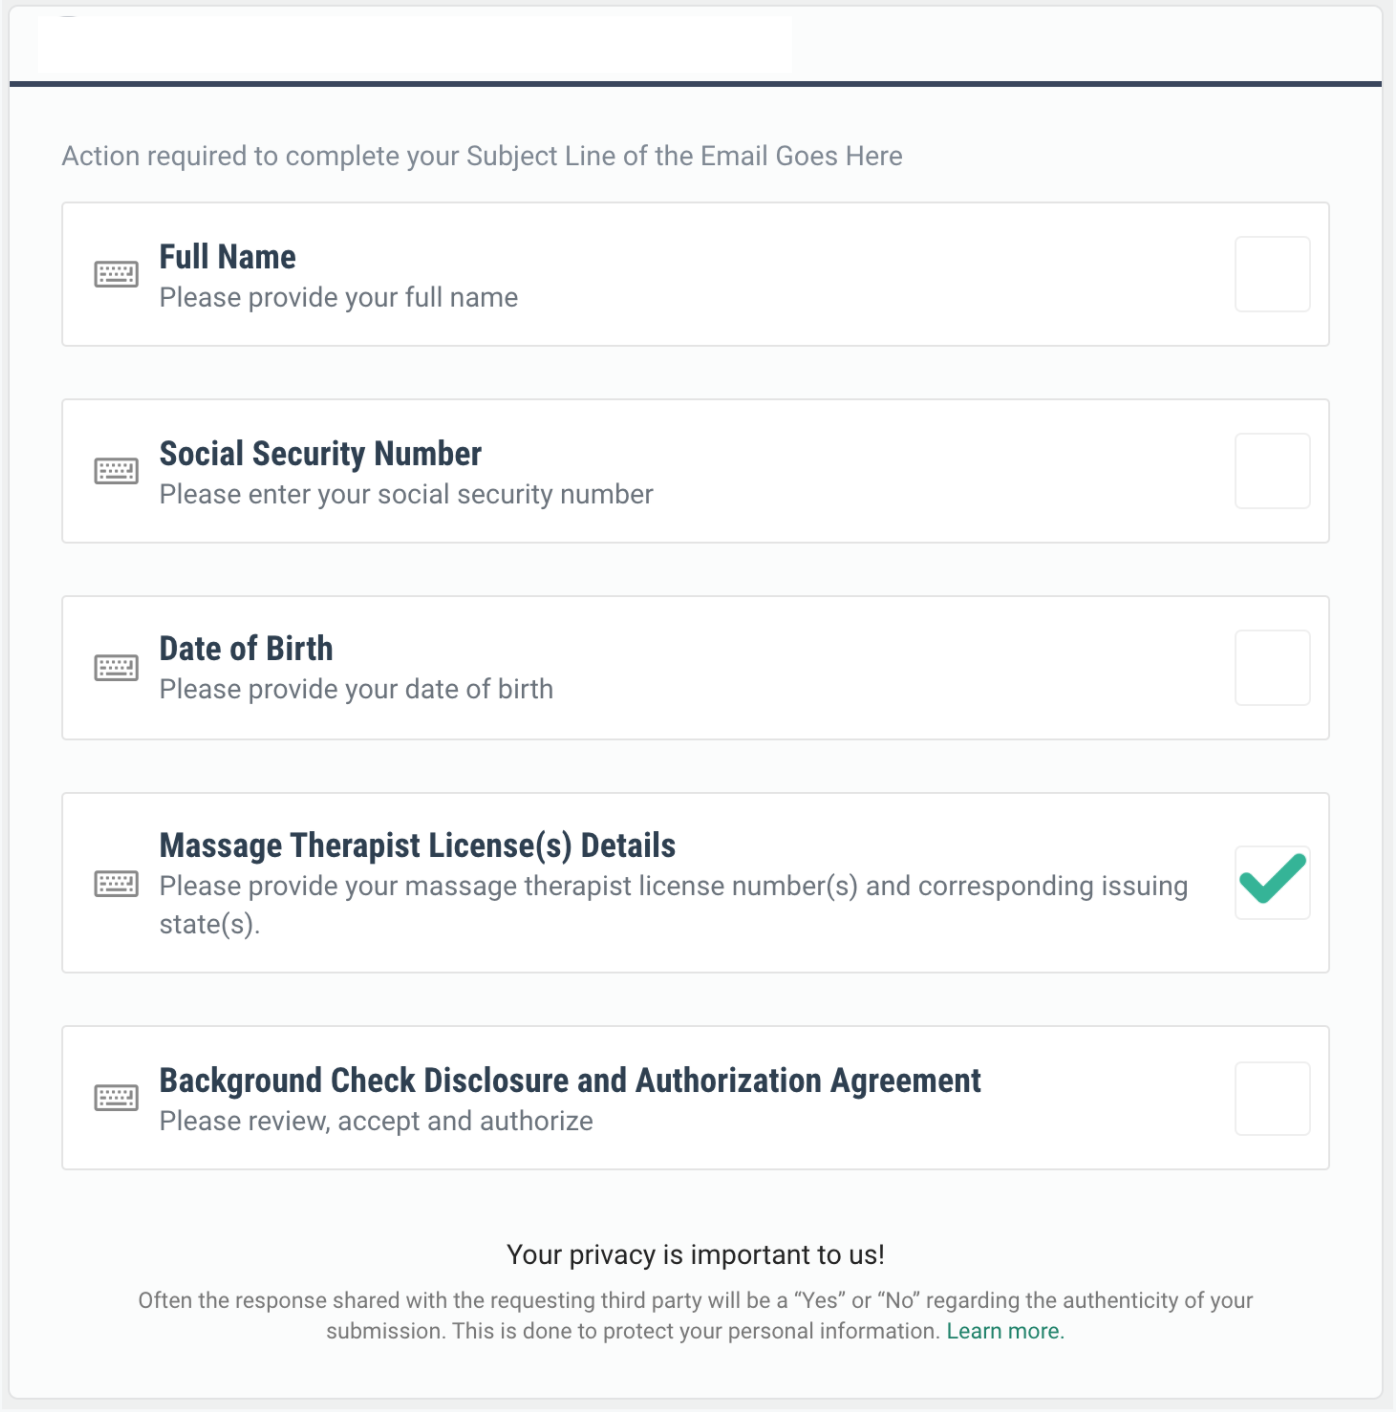
In the same way that you could email a single application or two or three different paper or .pdf applications to an individual outside of the Evident system, similar functionality is available in requests. However, if you were to add additional verifications to the request, the system is dynamic so that when you go to the submission form, it will collapse all the required forms into a single form that the applicant can fill out all at once. This makes Evident faster and more efficient for you and the user.
Therefore, if we add a background check verification and we need a full name for the background check and the massage license verification, we will only ask for that information a single time, and the submission page would look like this. In other words, Evident will not ask for information from a user twice.
________________________________________________________________________________________________________
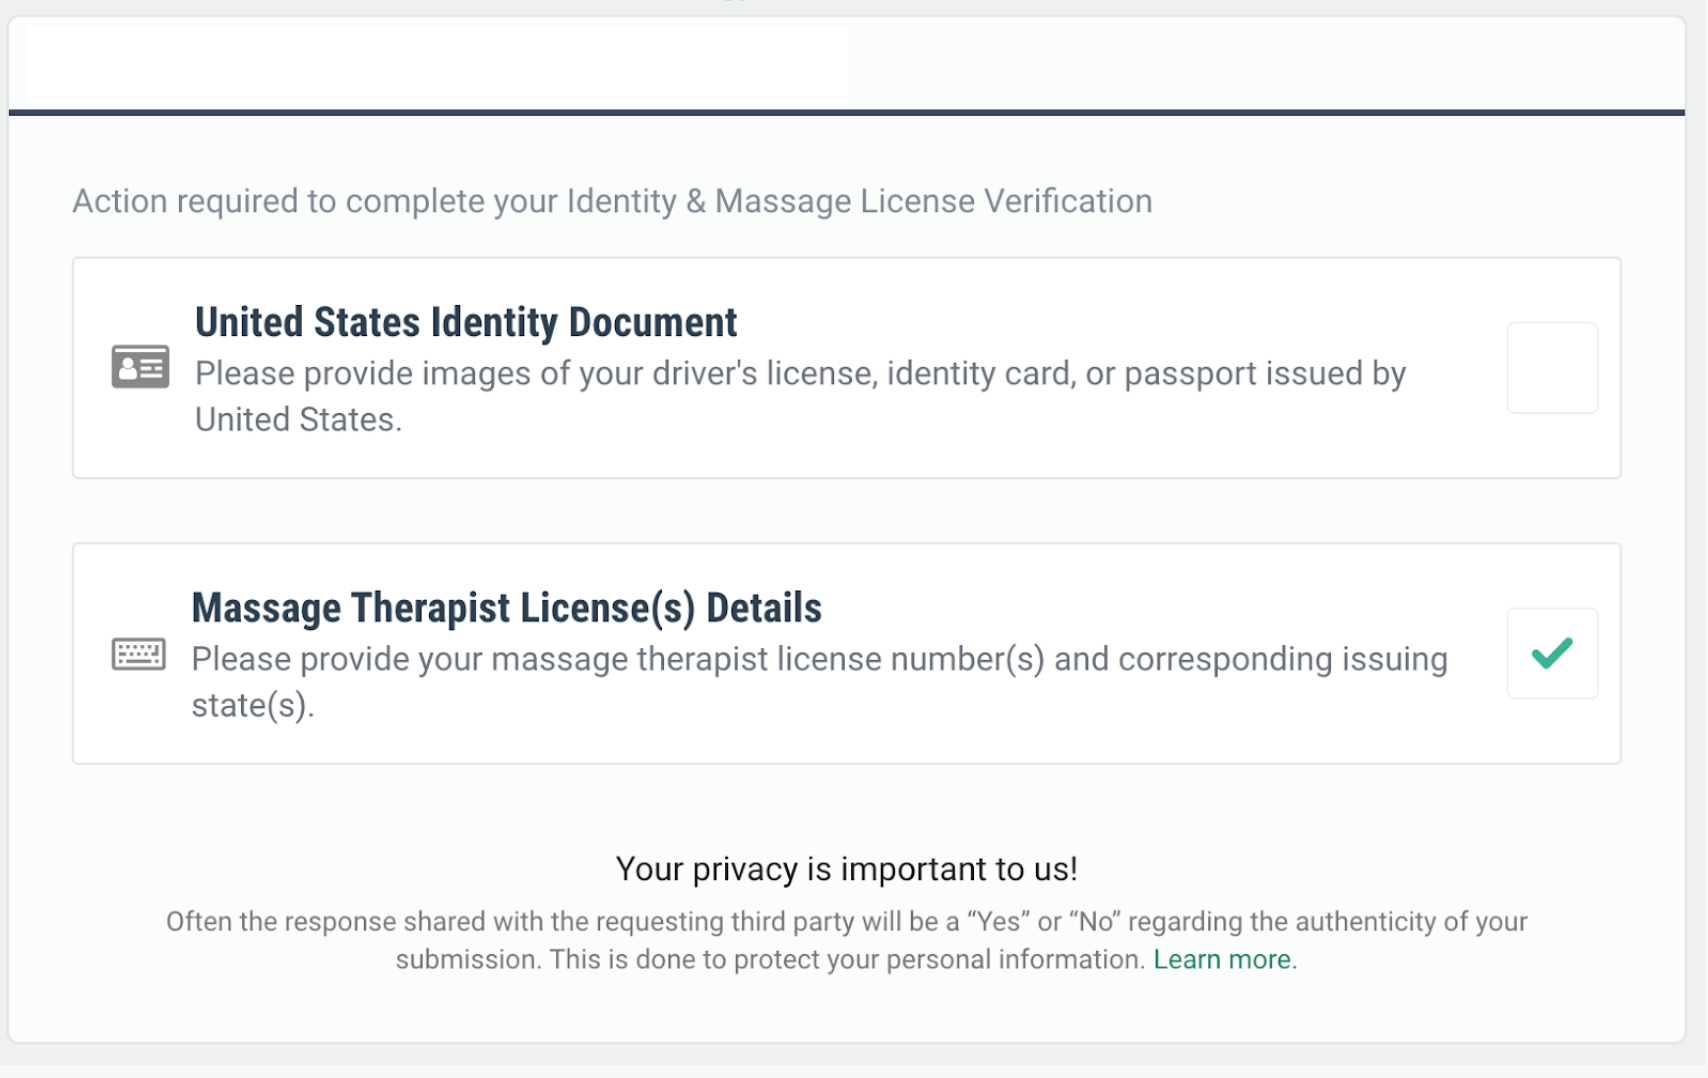
Now, If you wanted to complete an Identity Verification along with the massage license verification, the name to complete the massage license verification will be pulled from the identity document by either the computer vision technology or by a specially trained agent in the more rare case of human assist. That name is what will be used to complete the massage license verification.
 ________________________________________________________________________________________________________
Now that you've got a basic understanding of requests and how they operate, check out this article that outlines the components of a request.
You can also watch this video, which will show you how to create a request in real time.