
Under the Administration tab, you can customize your branding settings with Evident. This will be applied both to the submission form the applicant fills out and to the emails that are triggered by the request. Read more about how a request triggers and email and what this experience is like for the user here. From the Evident Dashboard, you on the left-hand side, you can see a tab labeled "Administration."
Click to expand the "Administration" tab and access your Account Setting options. Don't forget to click the "Save" button on the right side after you make any edits.
Administration
Here is a screenshot that shows what the Administration tab looks like when it has been expanded.

Click on "Branding Settings."
Here, you can update your account with the following basic information about your business and brand.
- Company Name
- Your brand logo in .PNG or .JPG format with a white or transparent background
- Your primary branding color

Now click on "Email Settings."
Requests tend to achieve higher response rates when they appear to have been sent directly from the business. This is why it’s helpful for your request emails to incorporate as much of your business’ specific branding as possible.
Sender Details
- Email "From" Name: Who is this email coming from?
- Email "Reply To" Name: If I respond, who does the email go to?
- Email "Reply To" Address: If I respond, what email address does it go to?
The Appearance:
This section is dynamic. Feel free to test out different color schemes by entering hex codes in the fields on the right. You'll notice the mock-up on the left will change accordingly so you can see what this will actually look like when the email is sent.

You can also customize the Confirmation Message and the Link Expiration message, which both tie to landing pages that your user will see.
Move on to the "Confirmation Message."
This message, which you can edit as needed, will display once an ID Owner (IDO) has uploaded their information via the request email. The Confirmation Message field is HTML-supported, so we suggest closing the loop by either directing them back to your website or giving them a next step or a call-to-action.

Move on to the "Link Expiration Message."
Once an email request expires, a message will appear when an user clicks on the "Begin Now" button, informing them that they need a new link because this one is no longer active. Requests will expire after 30 days if no action is taken by the user. You may customize the headline and messaging as you see fit.

Another crucial piece of your branding settings and customization is the area where you can configure the Verification Status Lookup feature for applicants.
Configuring Status Lookup for Applicants
Within the Evident portal, under the Administration tab, click on “Status Lookup Configuration”. There are two key components for configuring the status lookup pages for your applicants:
- Support Channel Information
- Workflow Management
The main difference to be aware of is that the support channel configurations are universal. In other words, they will display on all status lookup pages regardless of status. The Workflow Management - or “next step messages” - configurations are status-specific, and will change depending on the status of an applicant’s verification.
Configuring Support Channel Information
You can add a support URL (with a custom title), a support email address, and a support phone number in the Support Channel configuration. All of these are optional configurations, so you can add any combination of channels.
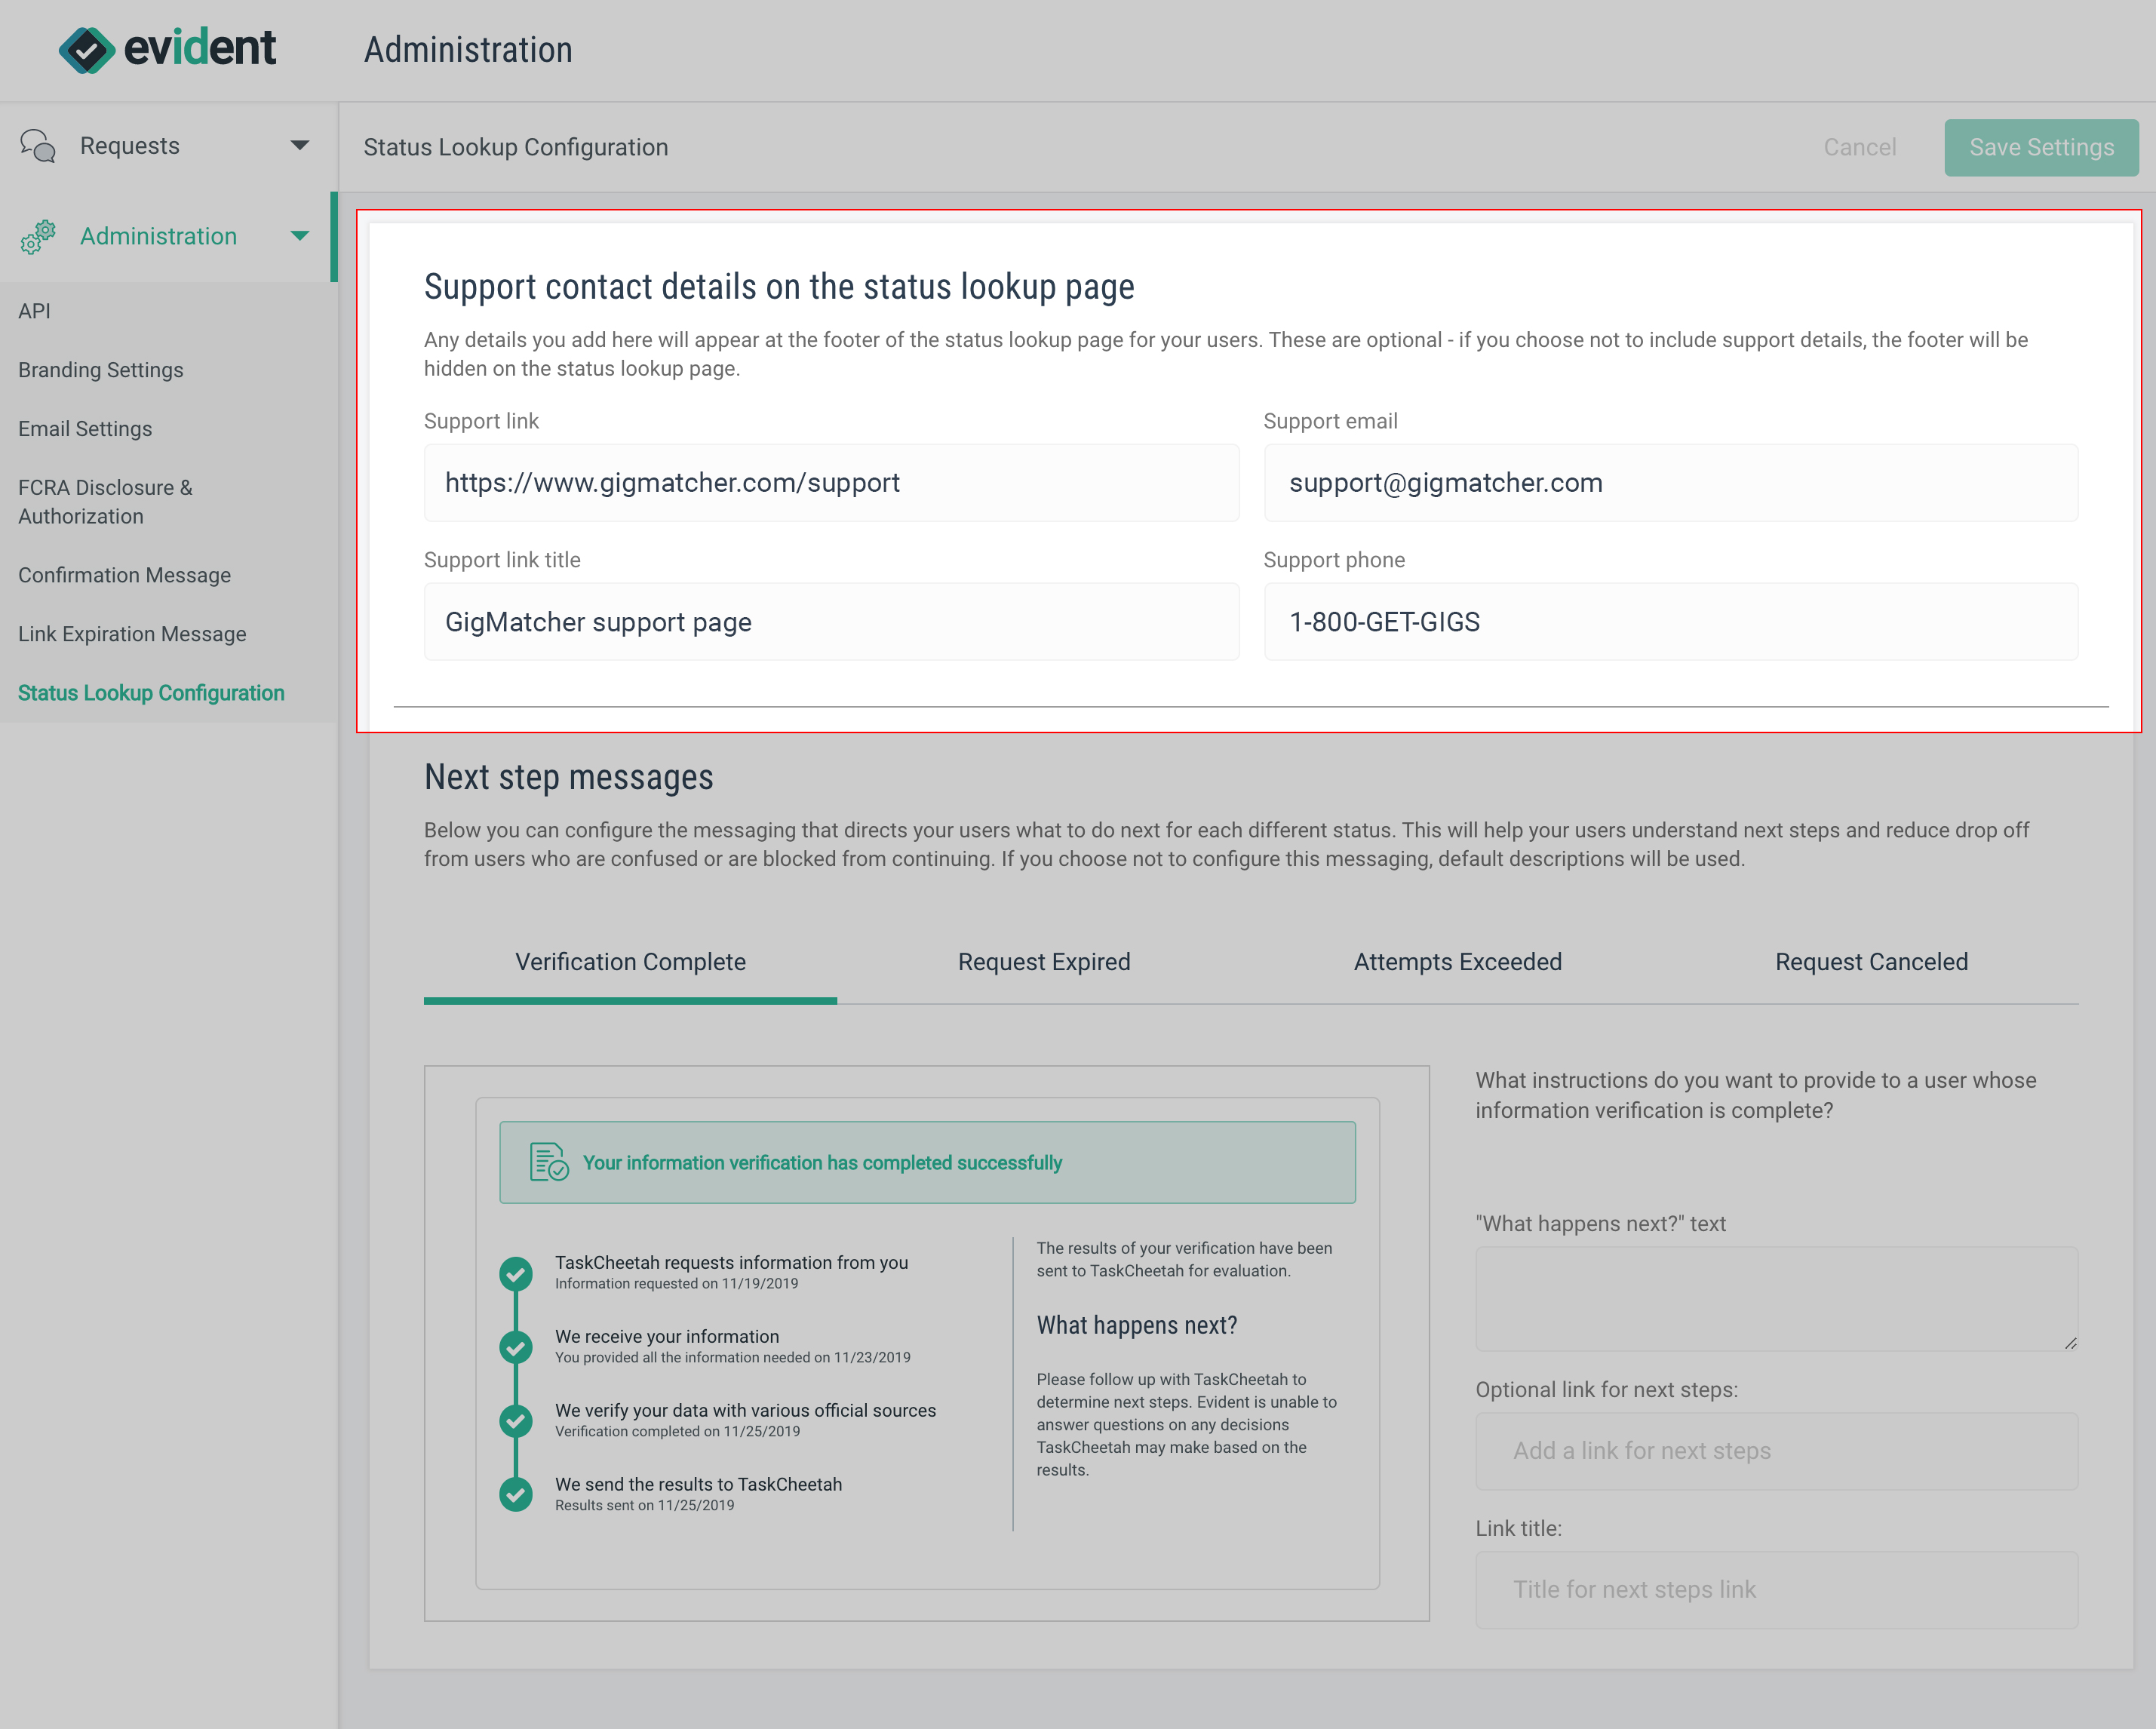
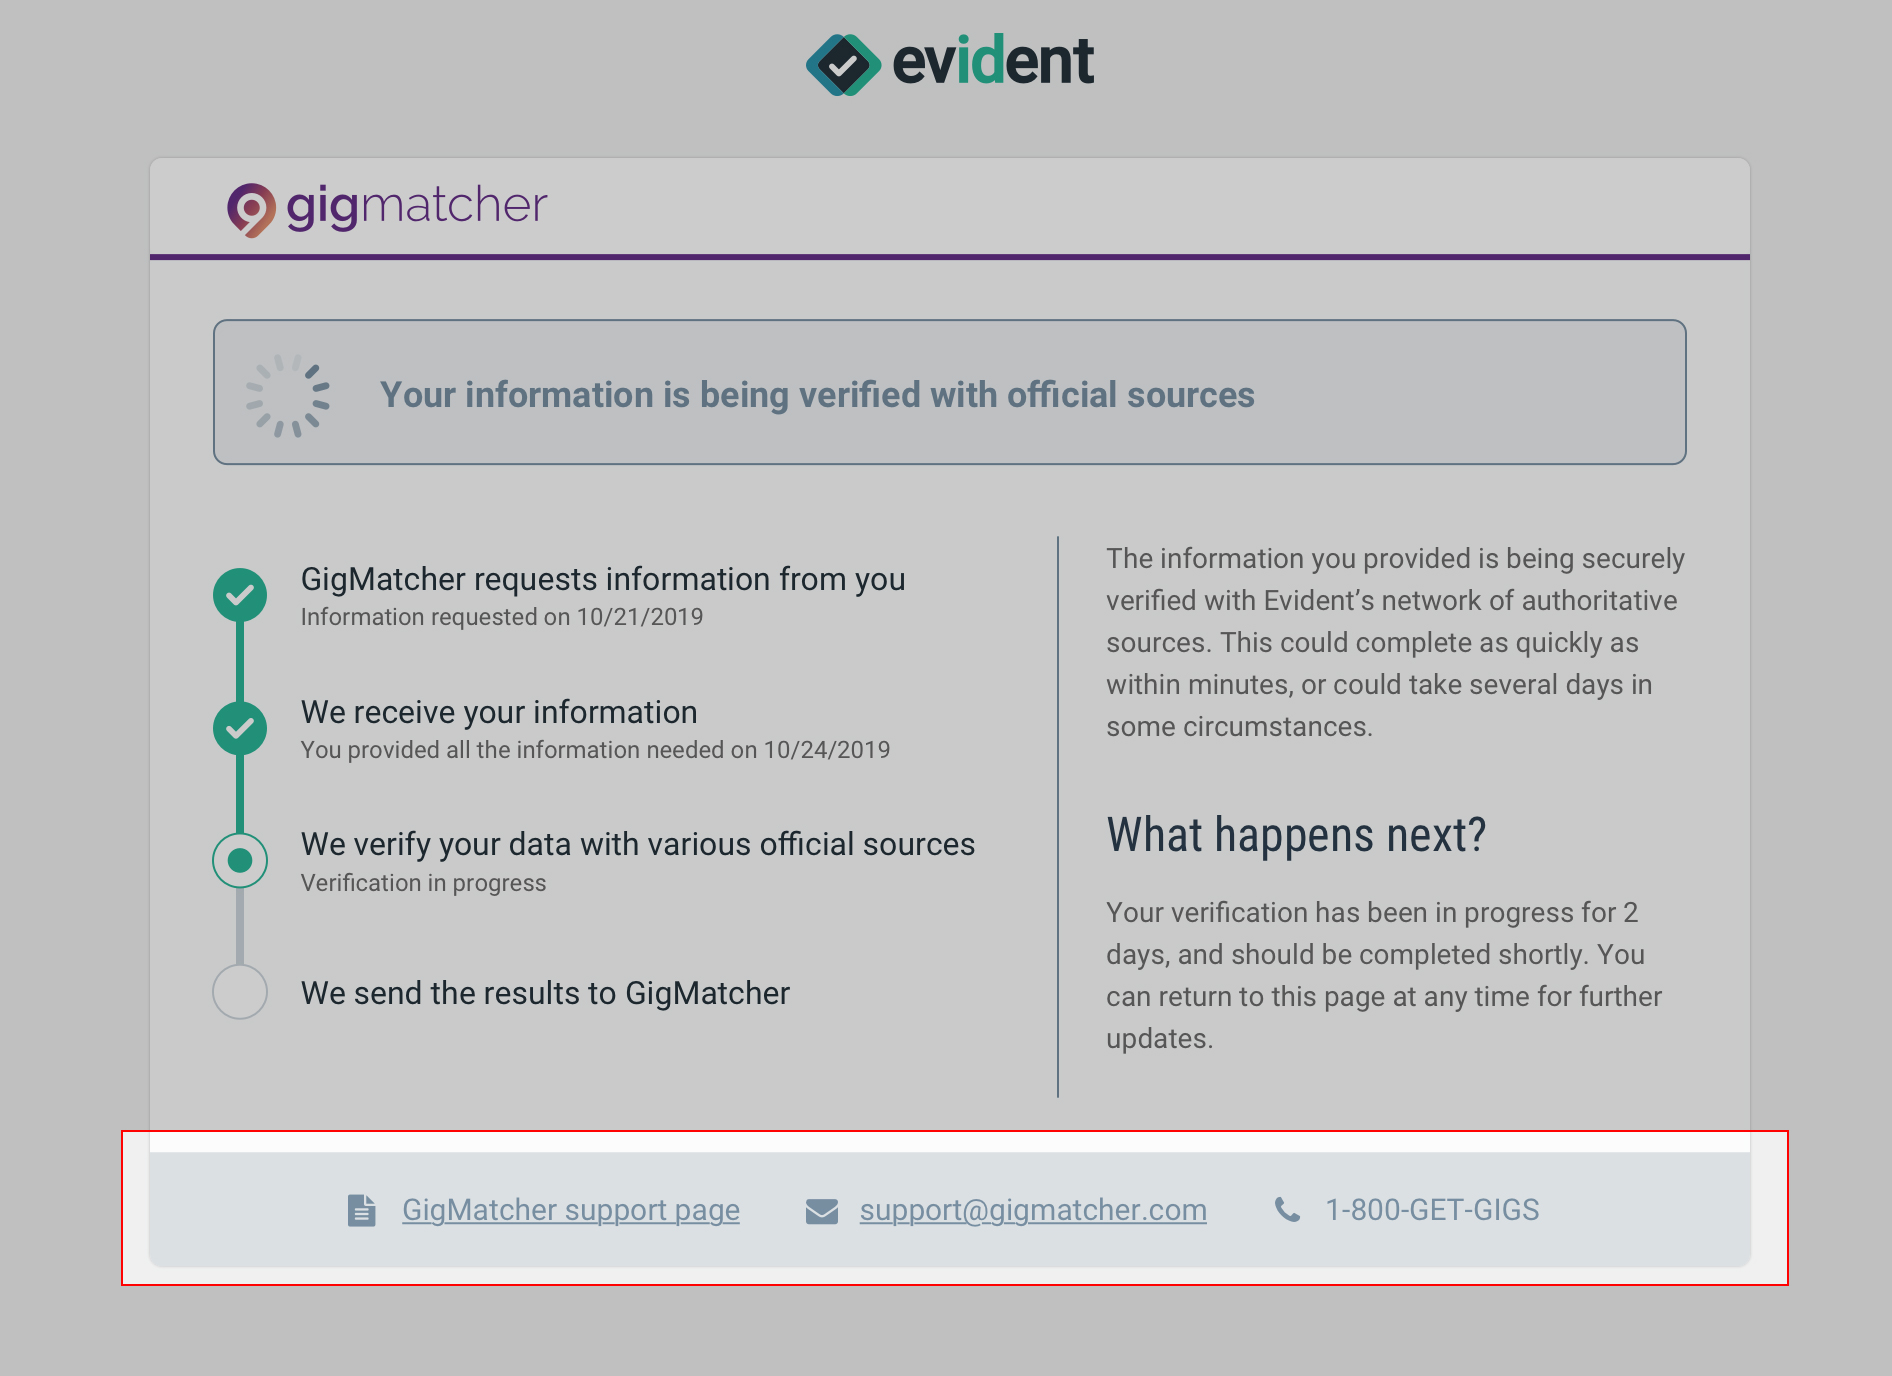
Any configurations you make here will display in the footer of your applicants’ status lookup pages. If you choose not to include any support channels here, the footer will be hidden from applicants.
Configuring Applicant Status Lookup for Workflow Management
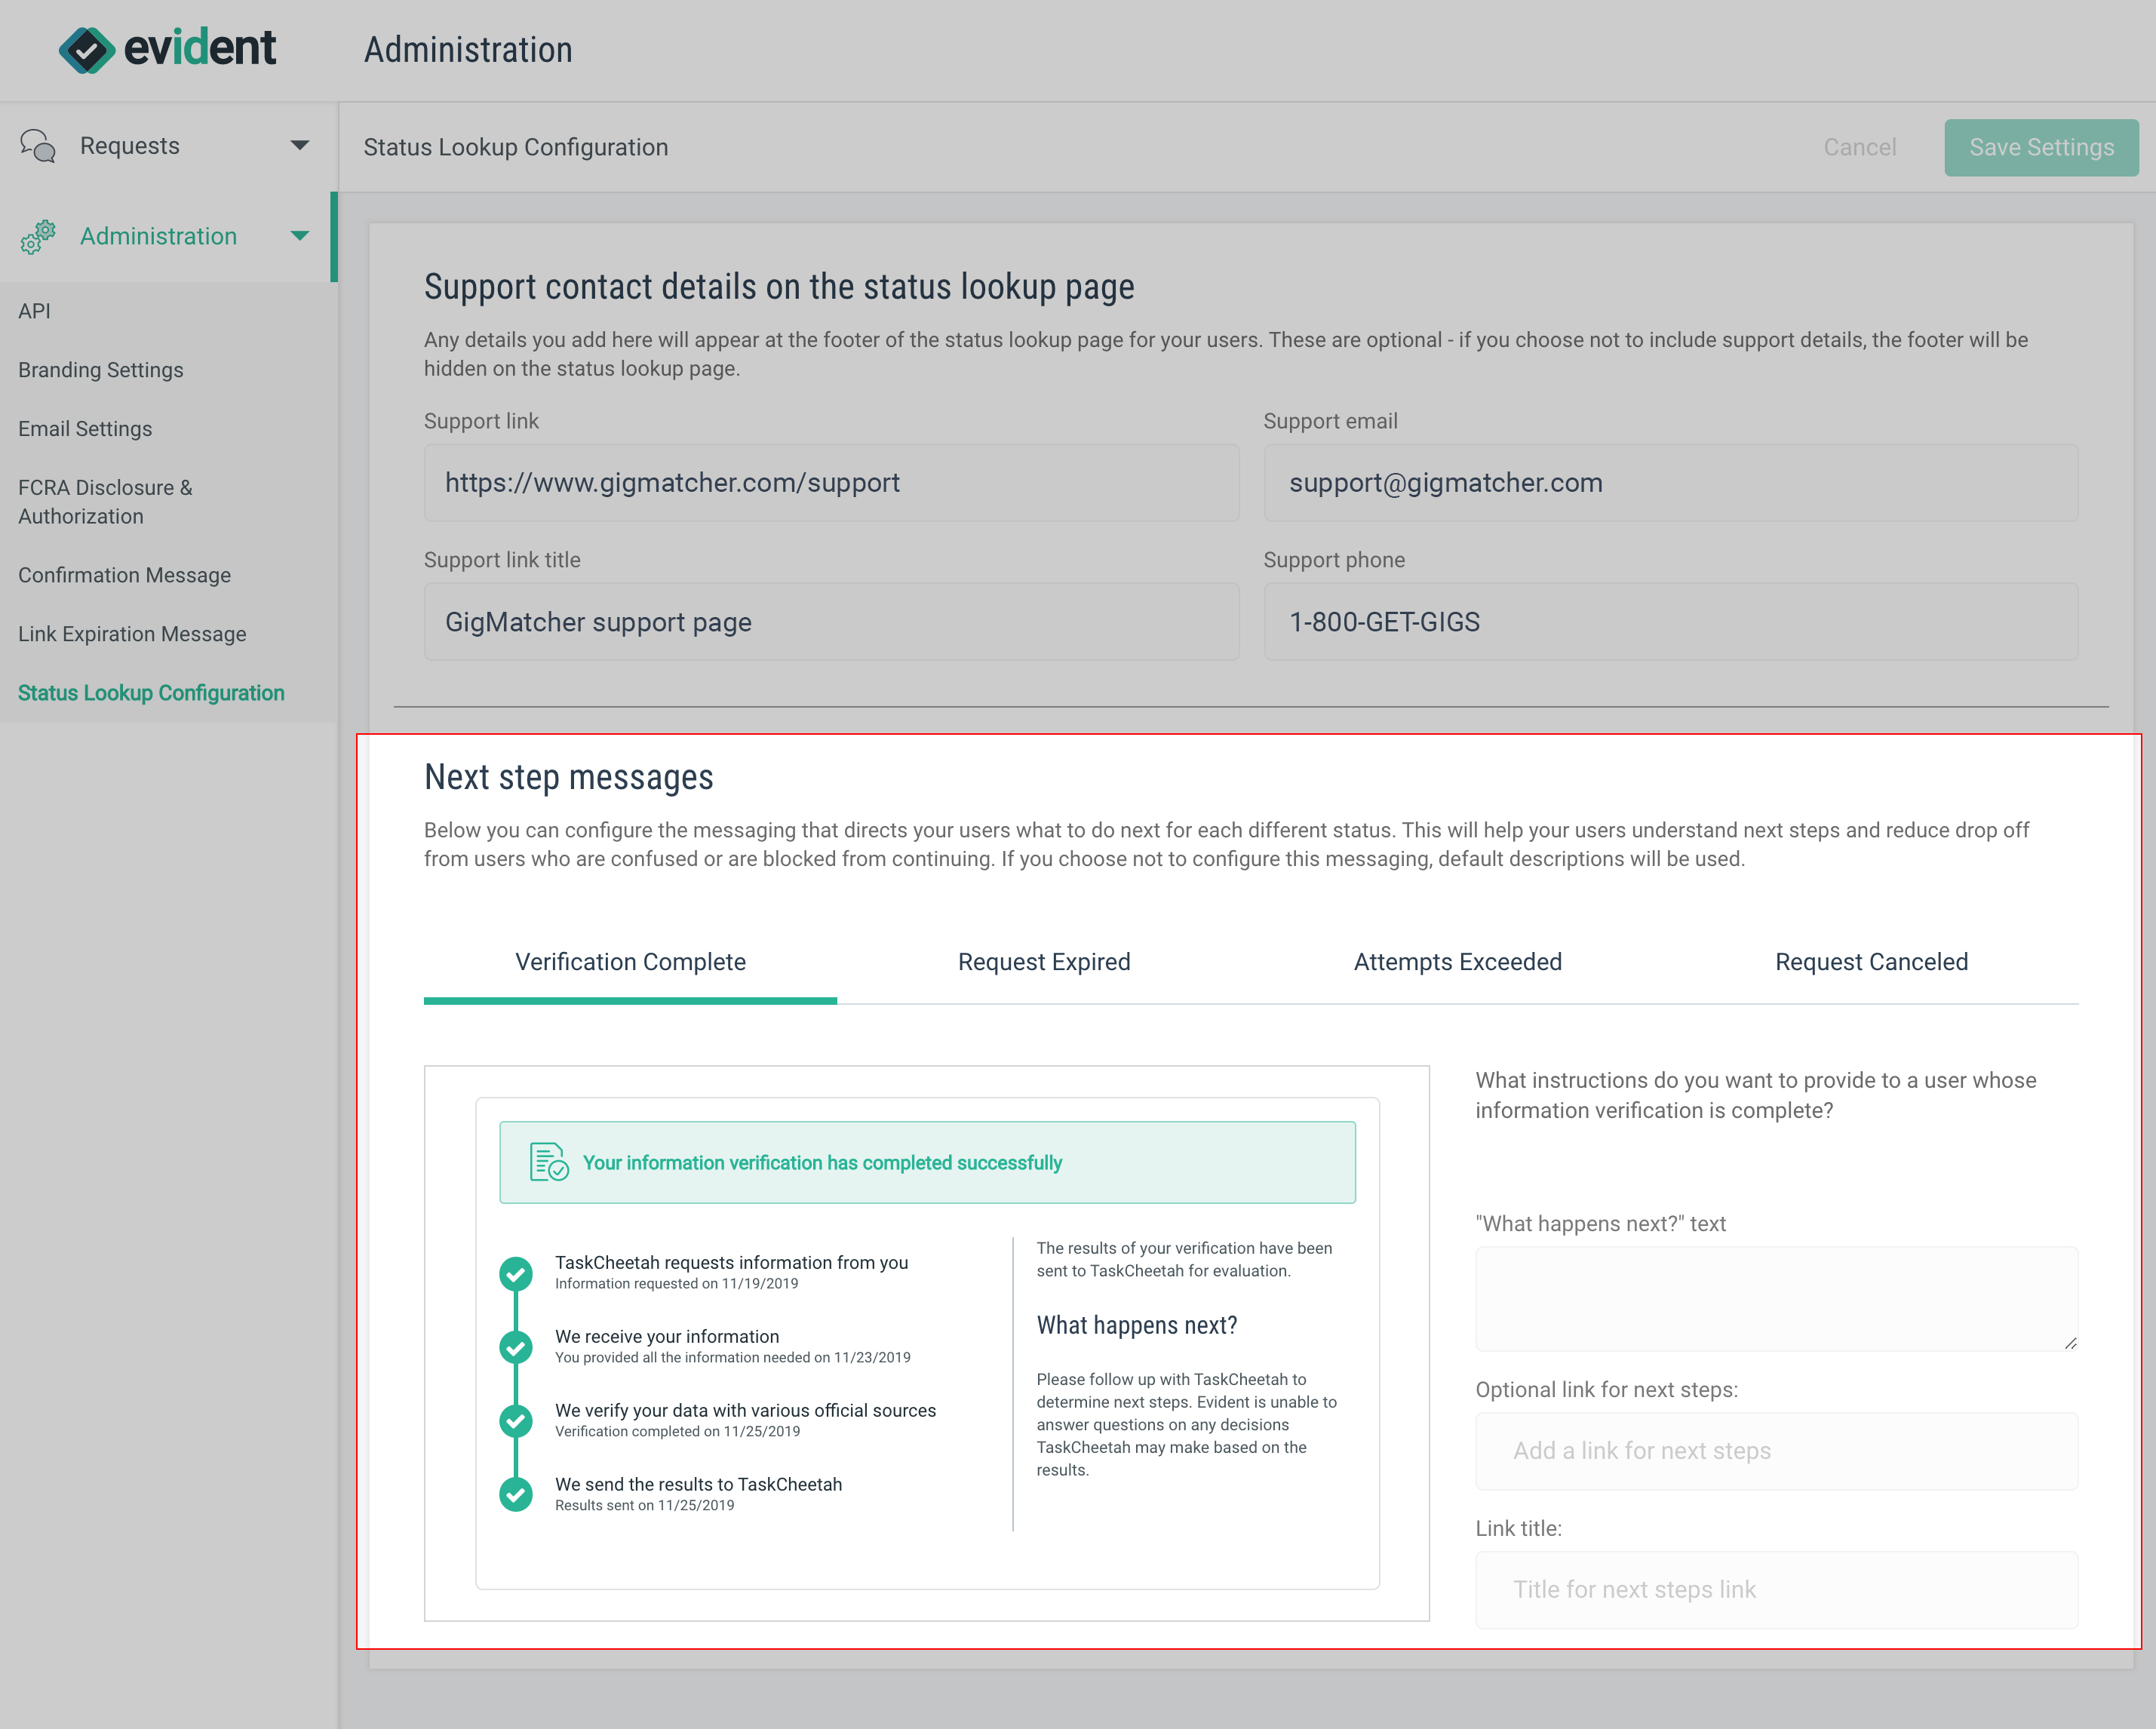
The messages that applicants see in the status lookup page are configurable on a per-status basis. This gives your team control over managing workflows not only for successful verifications but also for drop-offs and re-engagements too. Configuring these status messages can help you determine how applicants are re-engaging with your company, and can also help you direct applicants through your own processes. Within the configuration panel, you’ll see a live preview of what your applicants will see.
Workflow-specific messaging can be configured for the following statuses:
- Verification Complete: The applicant has submitted their information, and it has been verified by authoritative sources.
- Request Expired: The applicant has not responded to the verification request in time, and the request link has expired.
- Attempts Exceeded: The applicant has made a maximum of two failed attempts to submit their information (usually an identity document).
- Request Canceled: The applicant has already submitted their information, but the verification was manually terminated upon your request.
Note that verifications that are in process will use standardized messaging, and will let applicants know when an incomplete verification has aged beyond an expected timeframe.
While all of the above configurations can be fully customized with instructions and a call-to-action link, you can also opt to not customize anything, and use the default messaging instead.