
Enabling Evident ID in Fountain
-
Ask your Evident customer success manager to enable Fountain integration for you
You will discuss what verifications you want to perform, and what kind of workflow you want to build on top of them. You will also receive a set of Fountain-specific credentials, please note these are different from the VerifyAPI credentials on customer.evidentid.com
-
Ask your Fountain customer success manager to enable the Evident and custom stages for you
The Evident stage isn't available in Fountain by default, so please speak with your Fountain customer success manager to enable it for you. The custom stage is an advanced Fountain feature that lets you set up applicant-friendly workflows with longer running verifications, and needs to be enabled as well.
-
Configure the webhooks
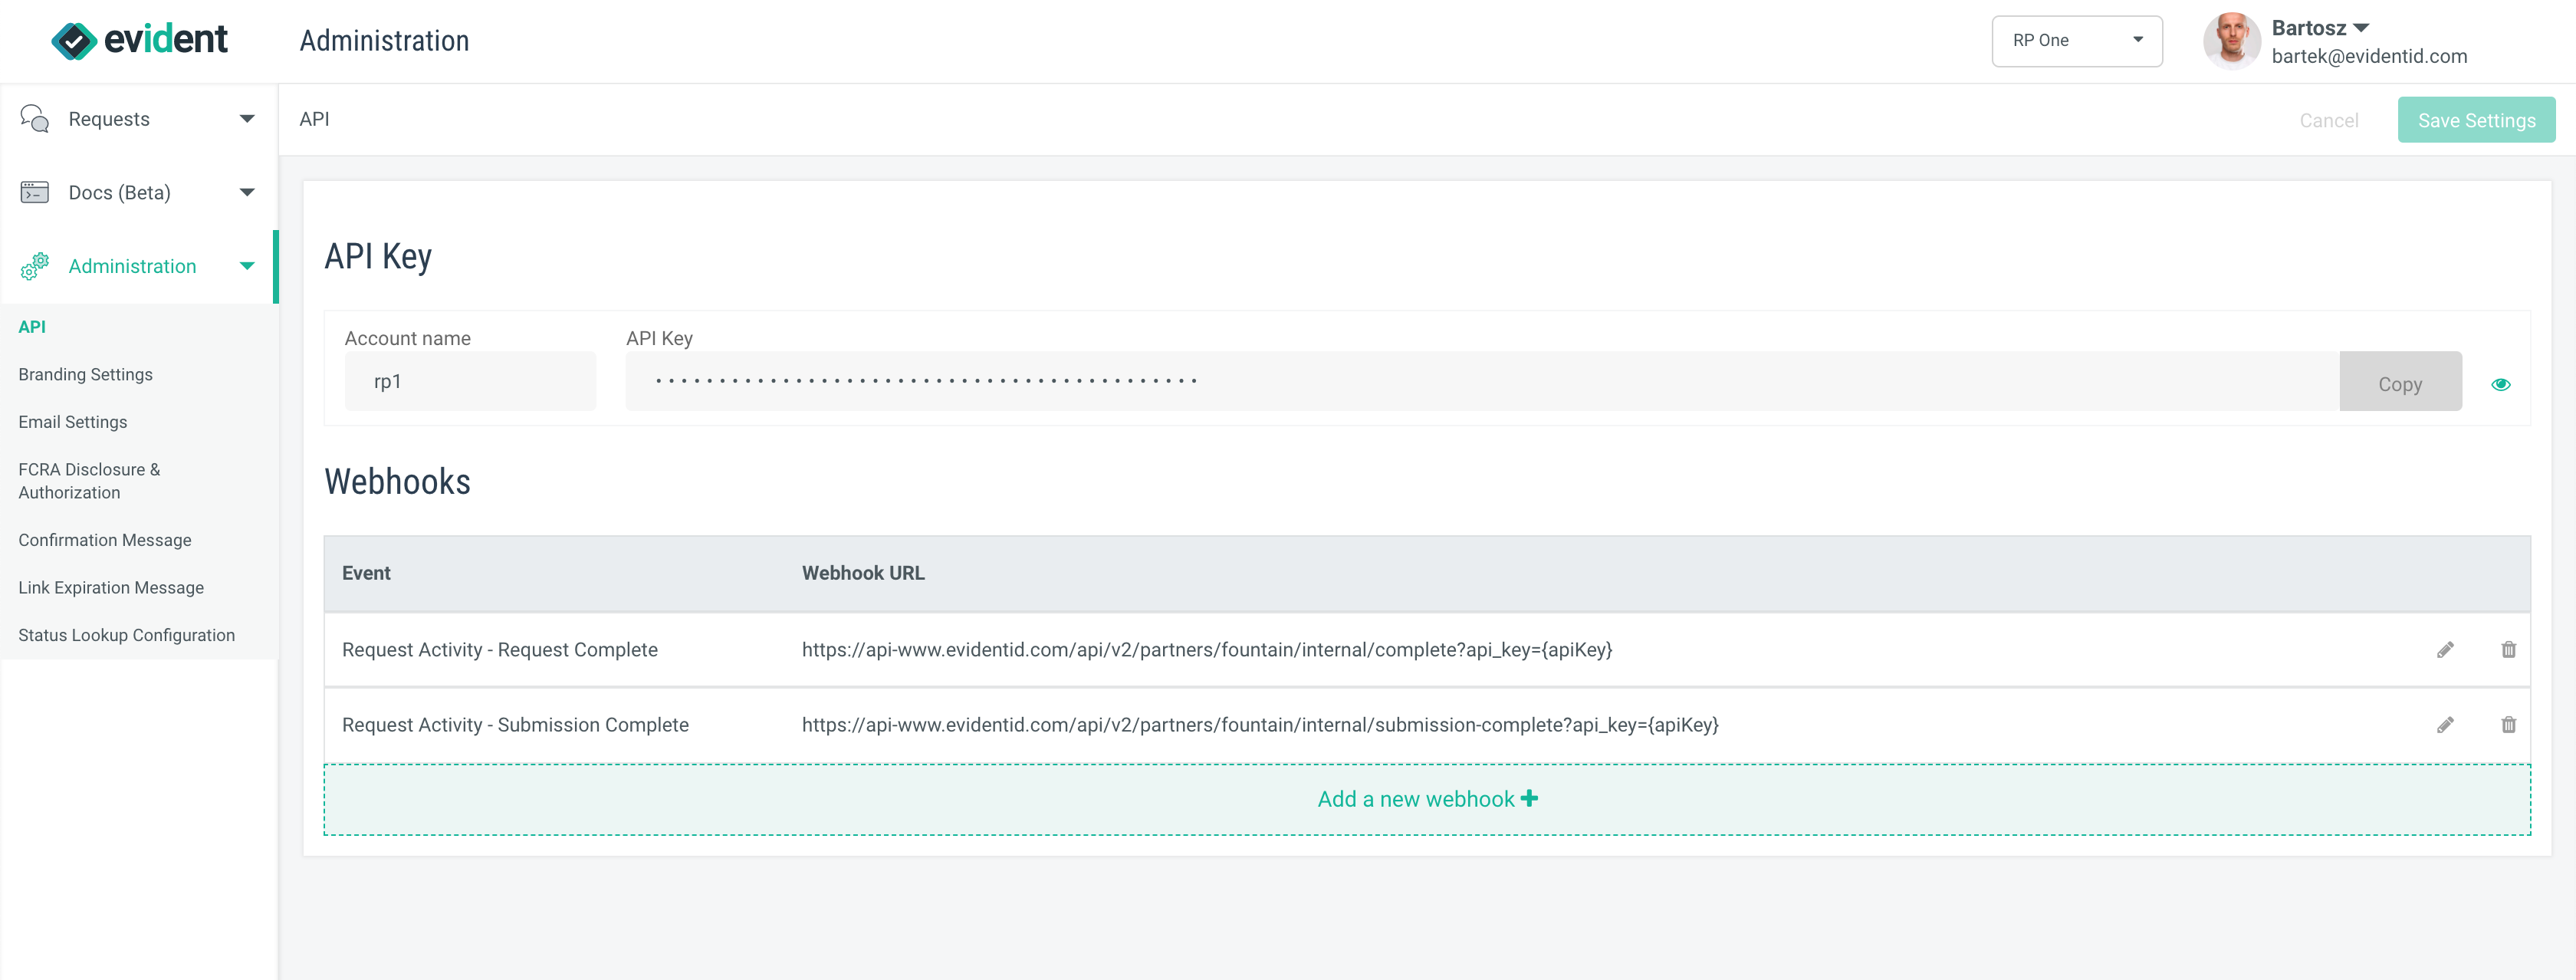
In the Evident customer portal add the "Submission Complete" and "Request Complete" webhooks with the following URLs. The apiKey will be provided by the Evident team.- https://api-www.evidentid.com/api/v2/partners/fountain/internal/submission-complete?api_key={apiKey}
-
https://api-www.evidentid.com/api/v2/partners/fountain/internal/complete?api_key={apiKey}
- https://api-www.evidentid.com/api/v2/partners/fountain/internal/timeout?api_key={apiKey}
This step may be done on your behalf by the Evident team.
-
Connect to Evident ID in Fountain
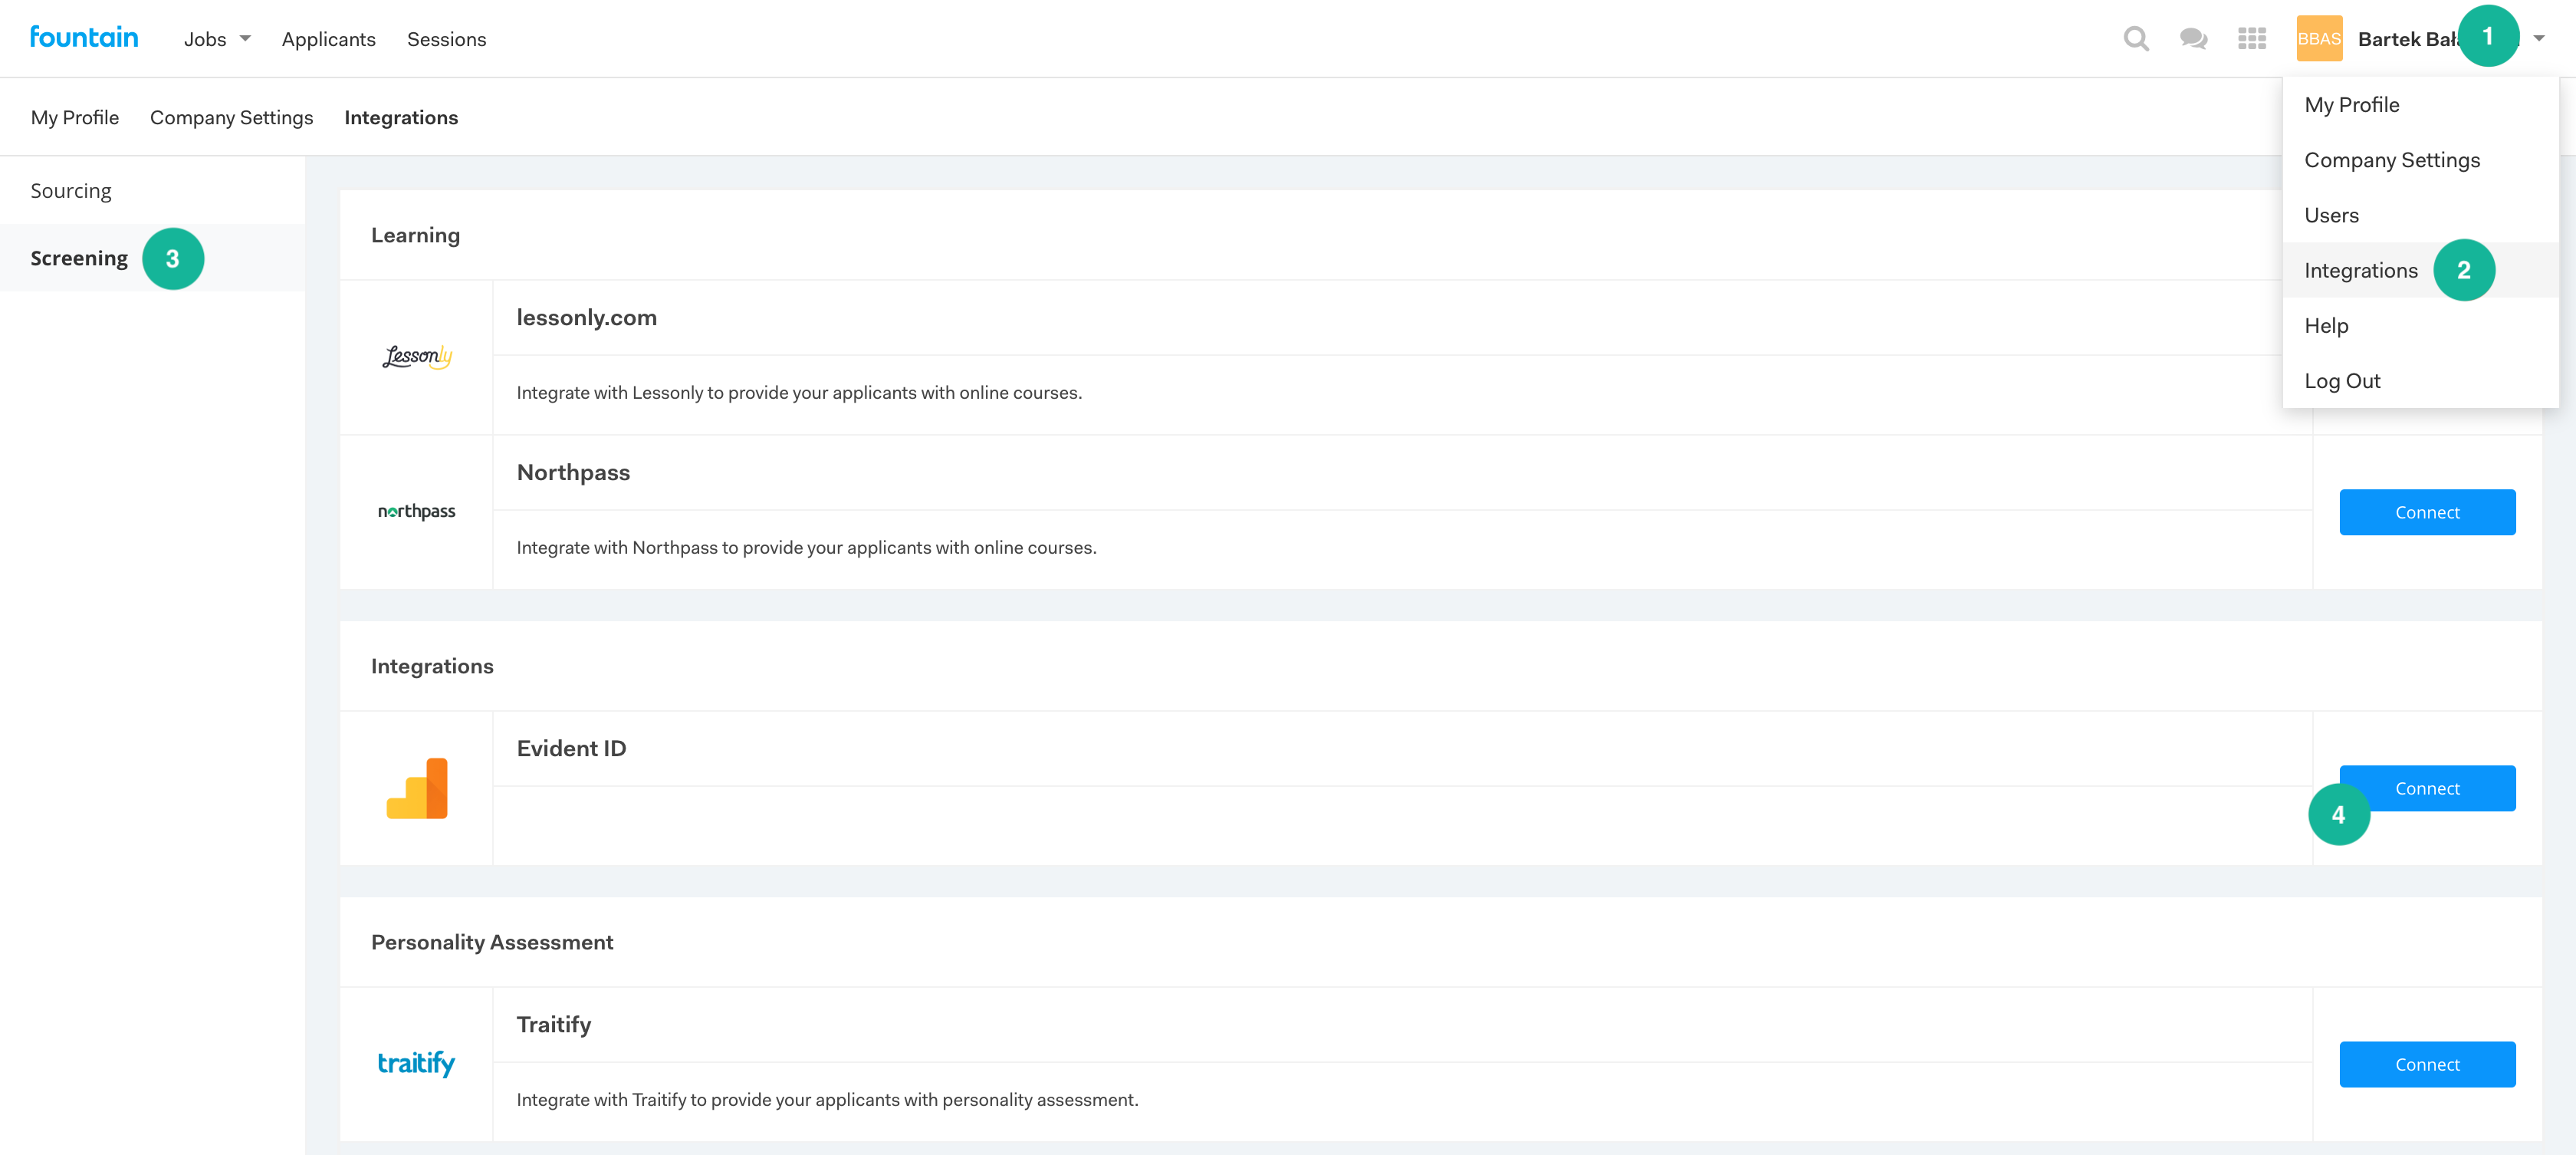
Go to your user name (1) -> Integrations (2) -> Screening (4) -> Evident ID - Connect (4).
-
Add your API credentials
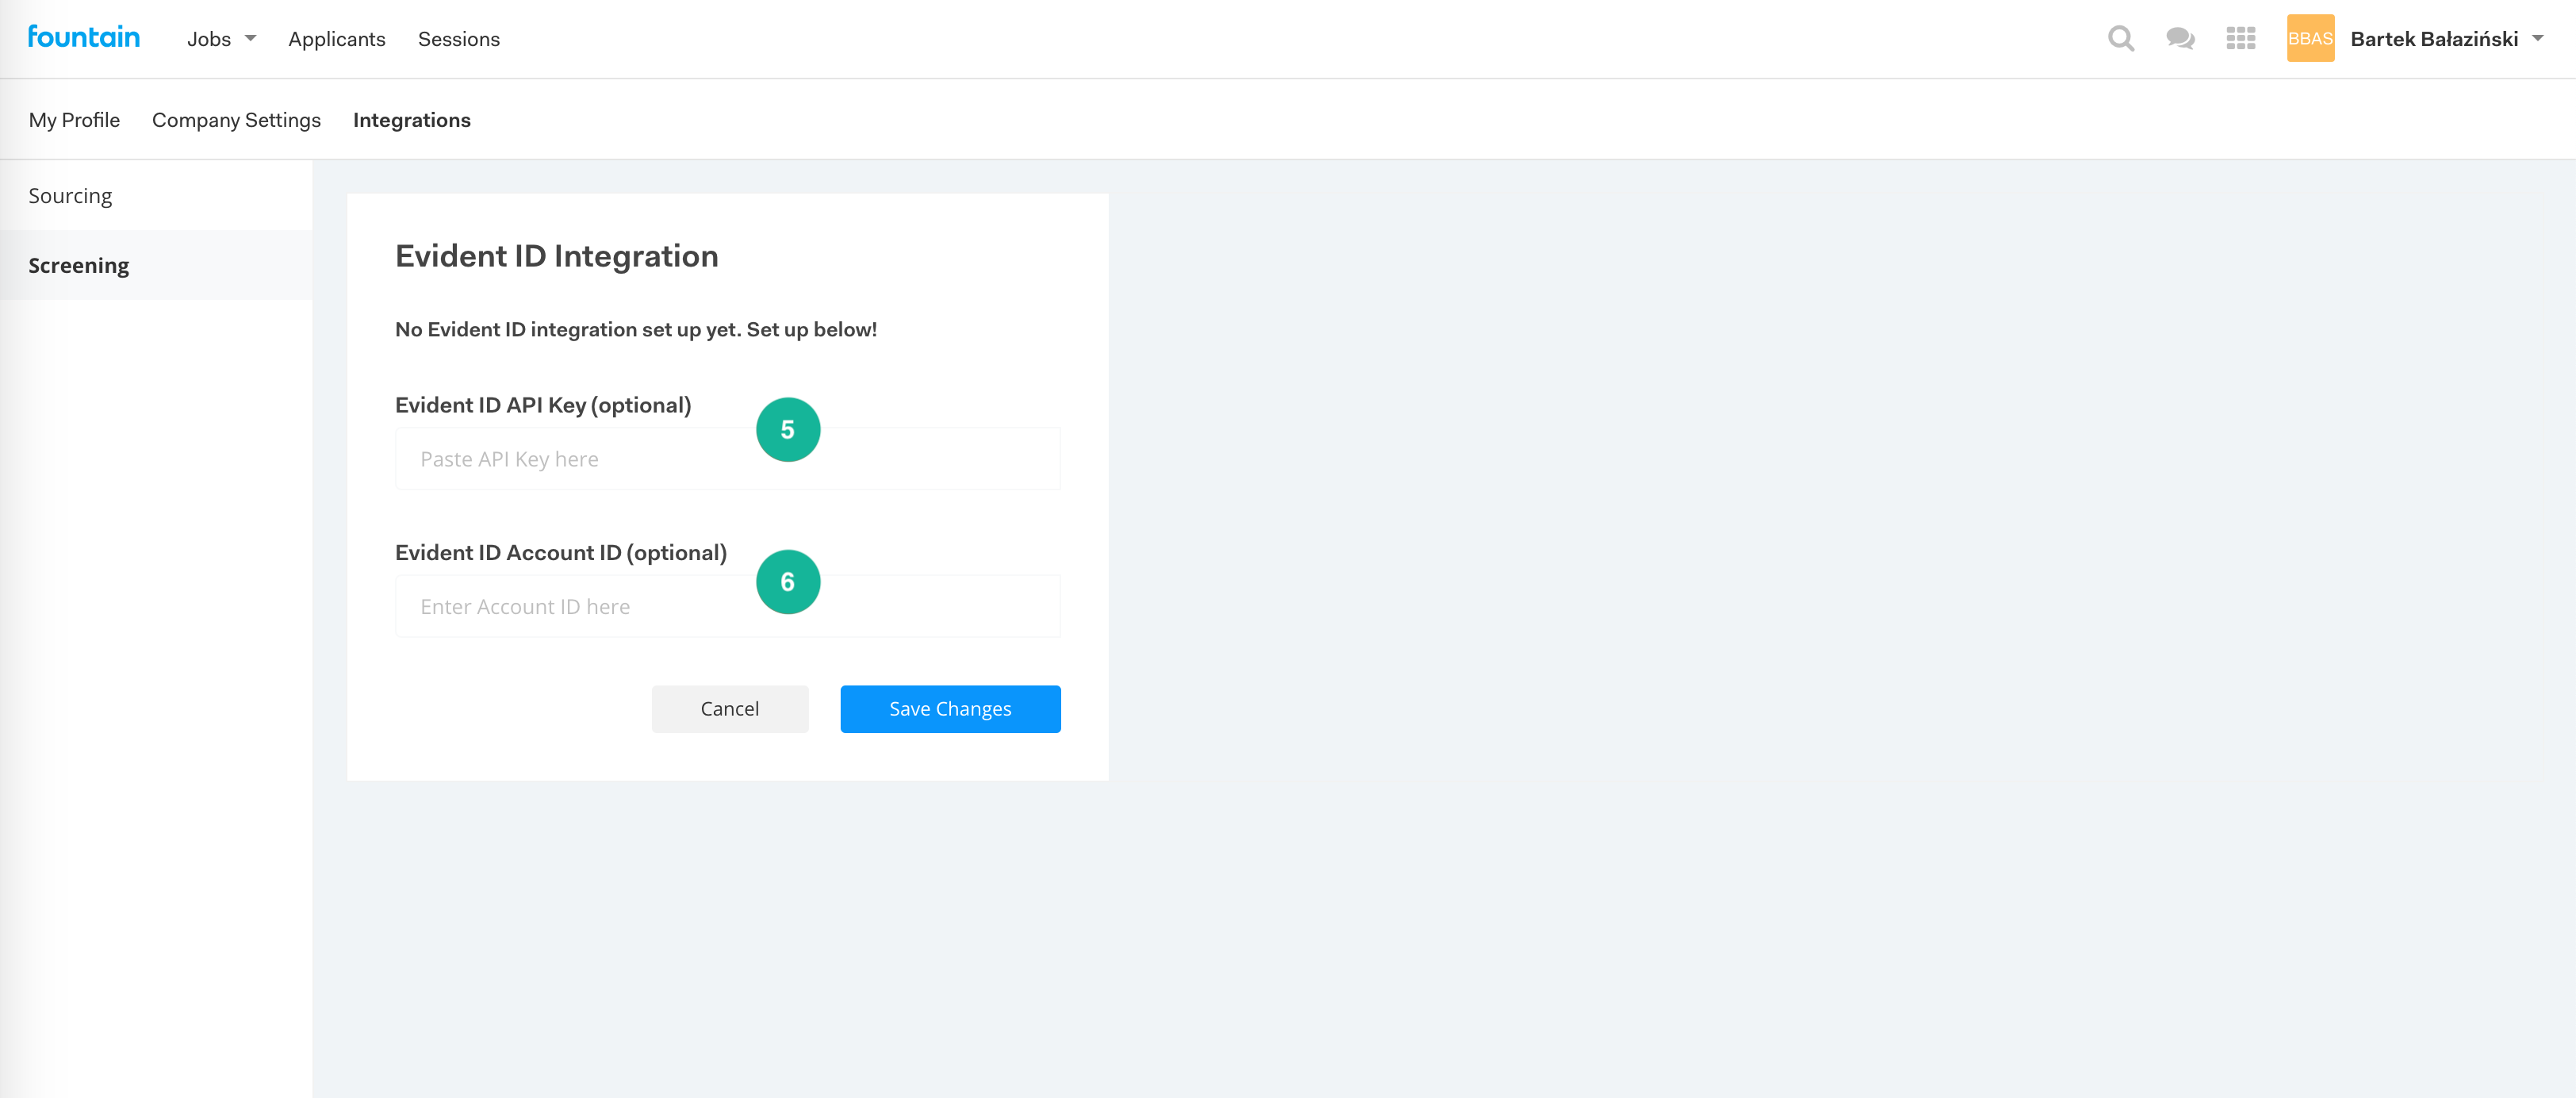
You will have received your API Key (5) and Account ID (6) from your Evident customer success manager.
-
Now build your workflow
You have configured the integration and can proceed to building a workflow using the Evident stage.
Using the Evident ID Stage in a Workflow
-
Add the Evident stage to your workflow
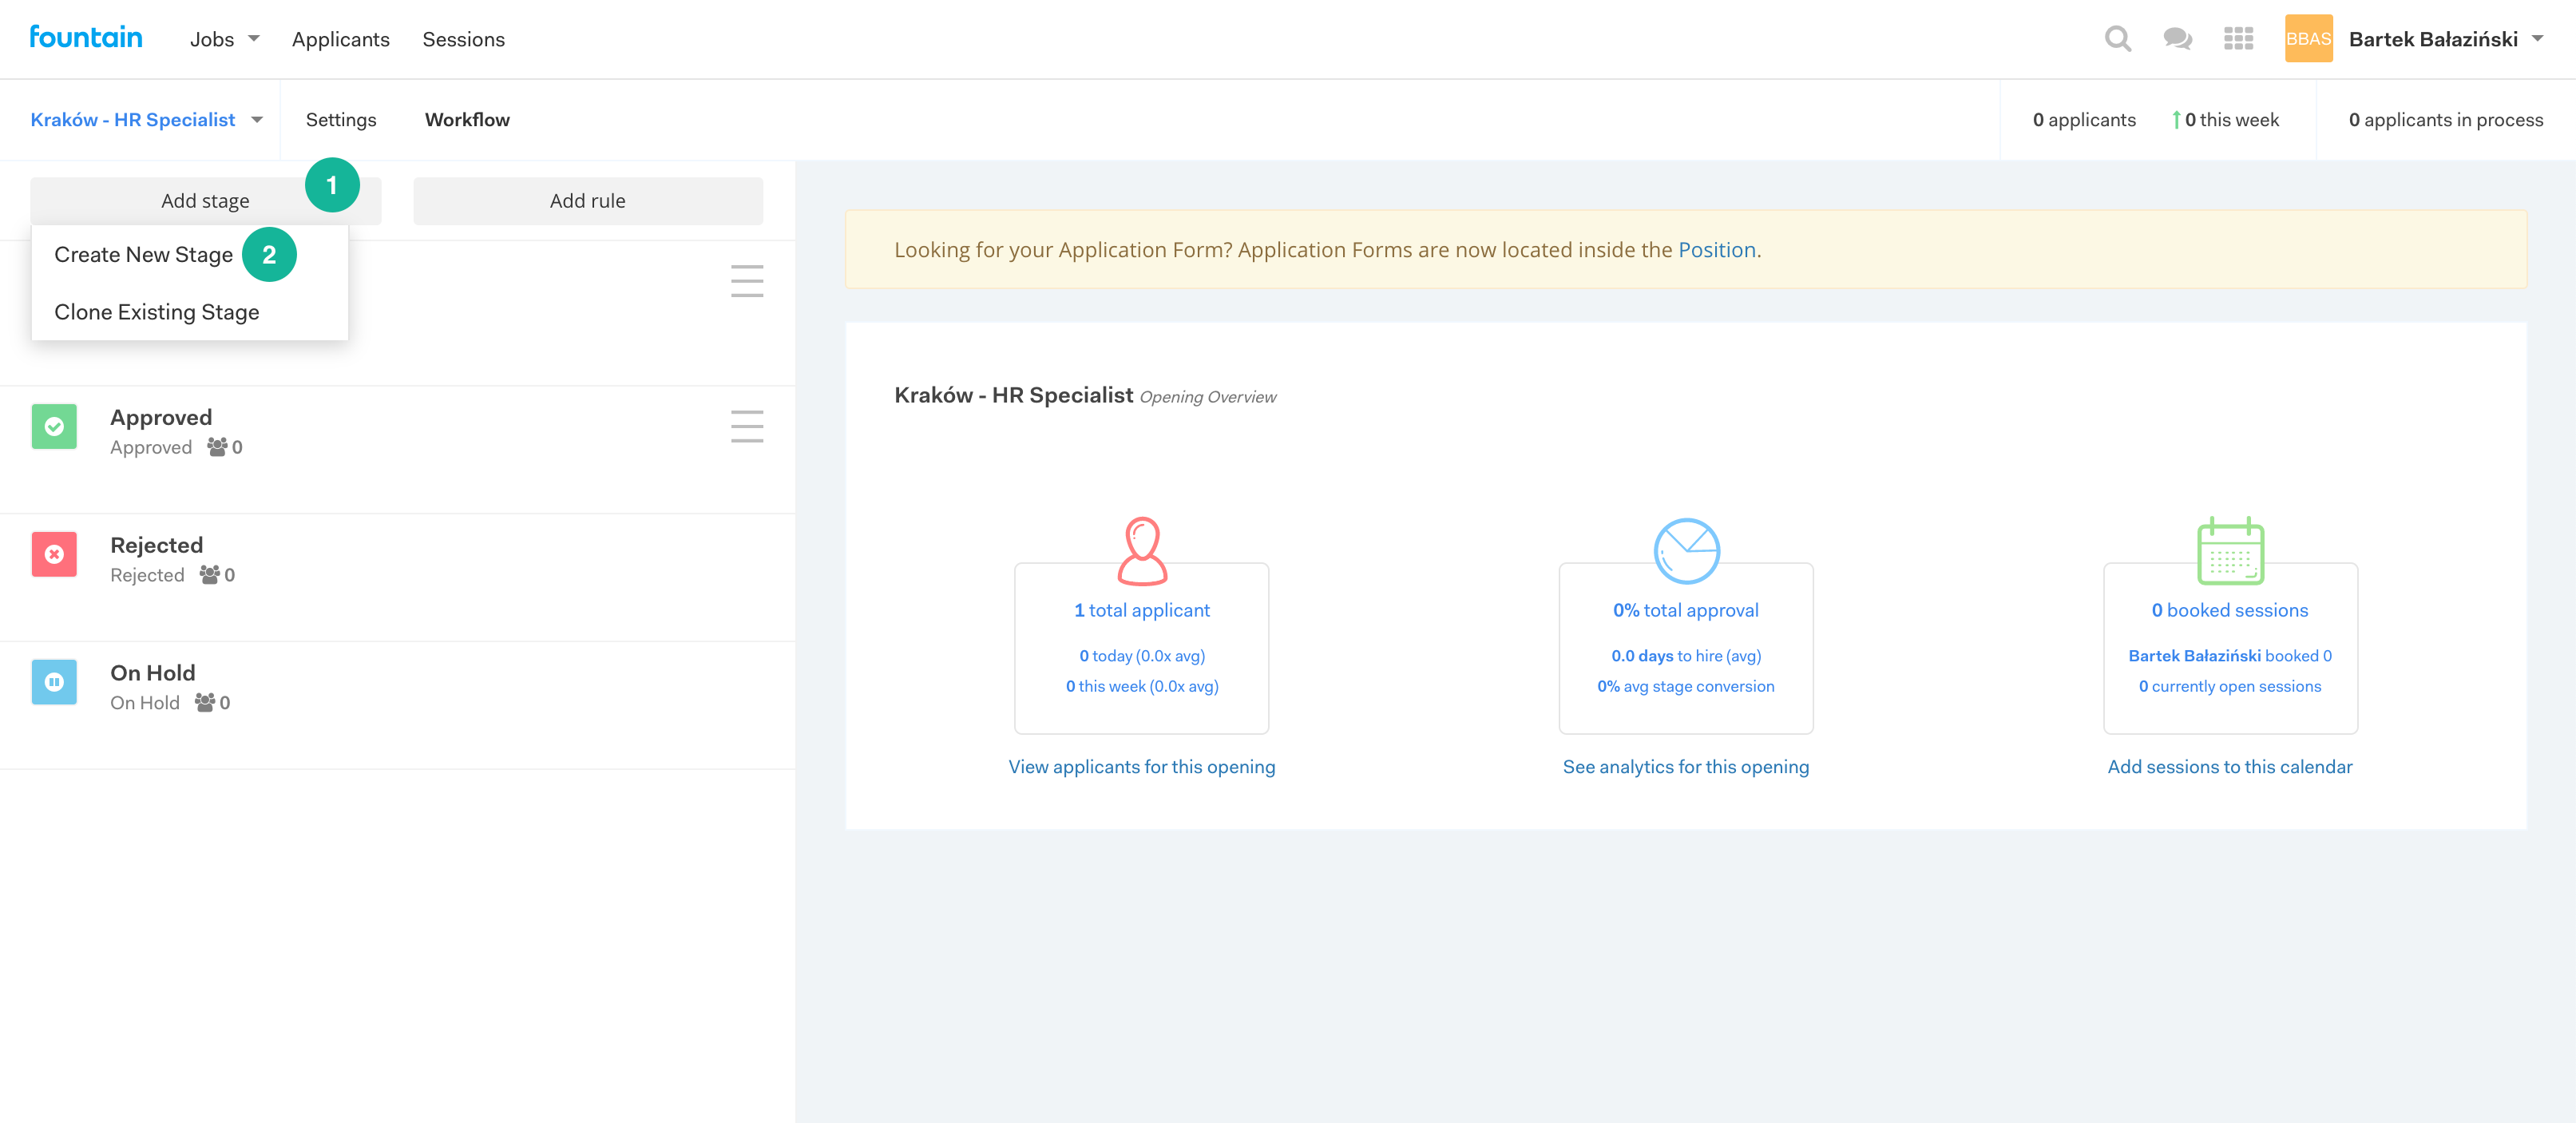
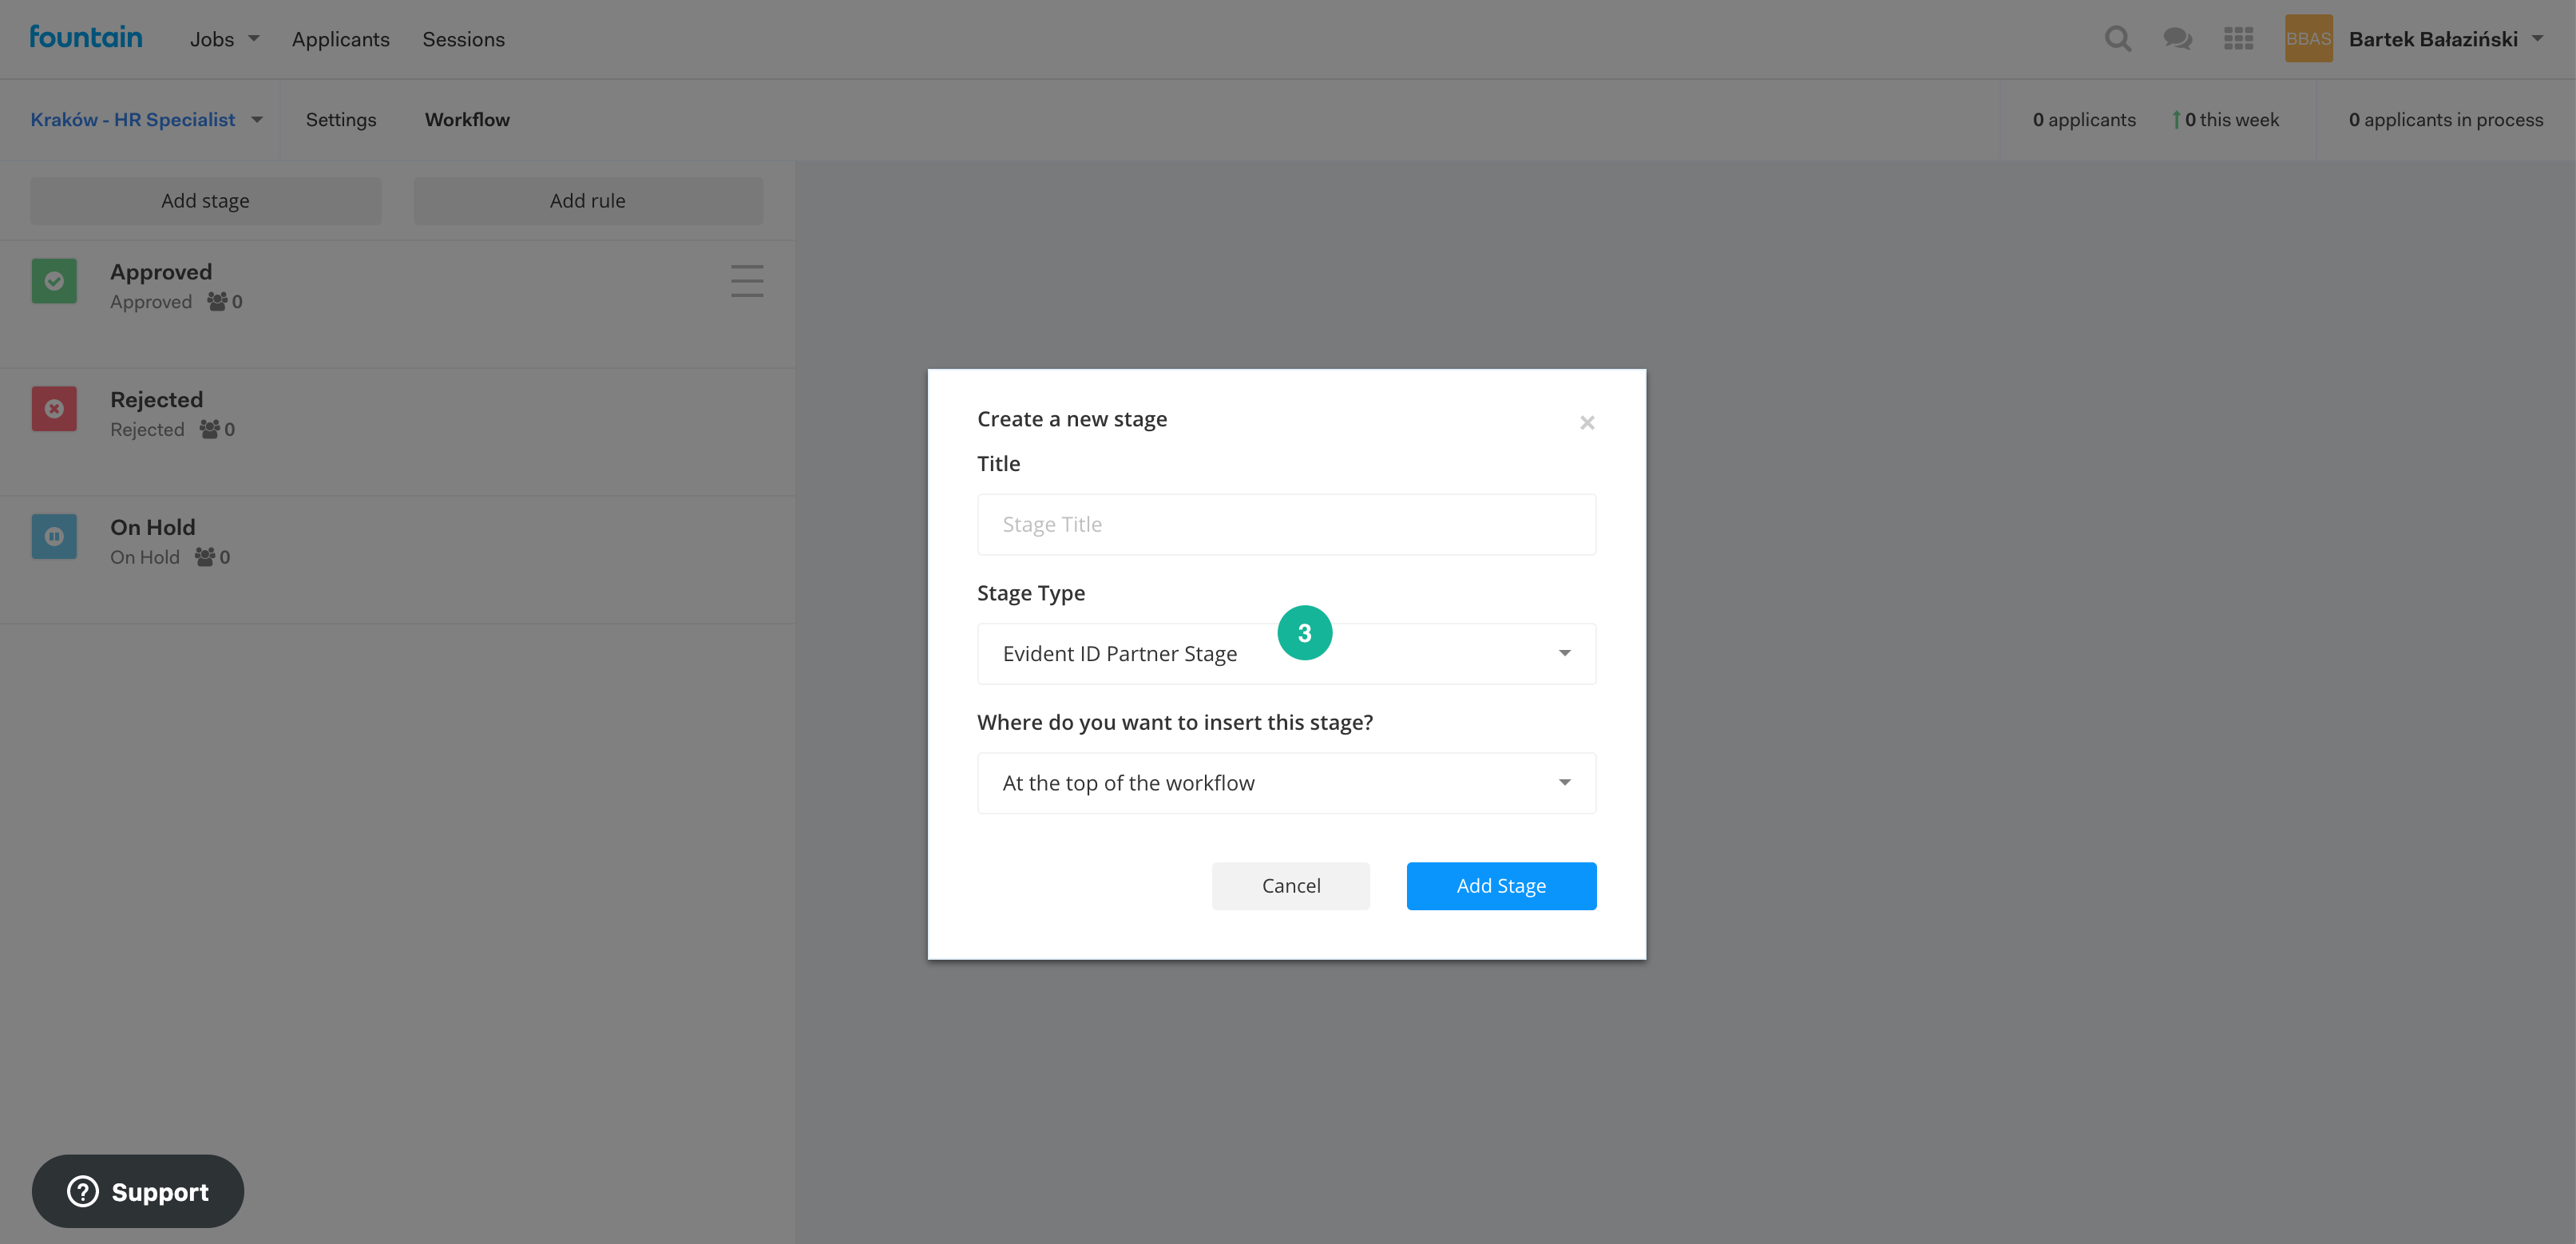
On the workflow screen select "Add stage" (1) and then "Create New Stage" (2). On the modal window select "Evident ID Partner Stage" as the stage type (3).
-
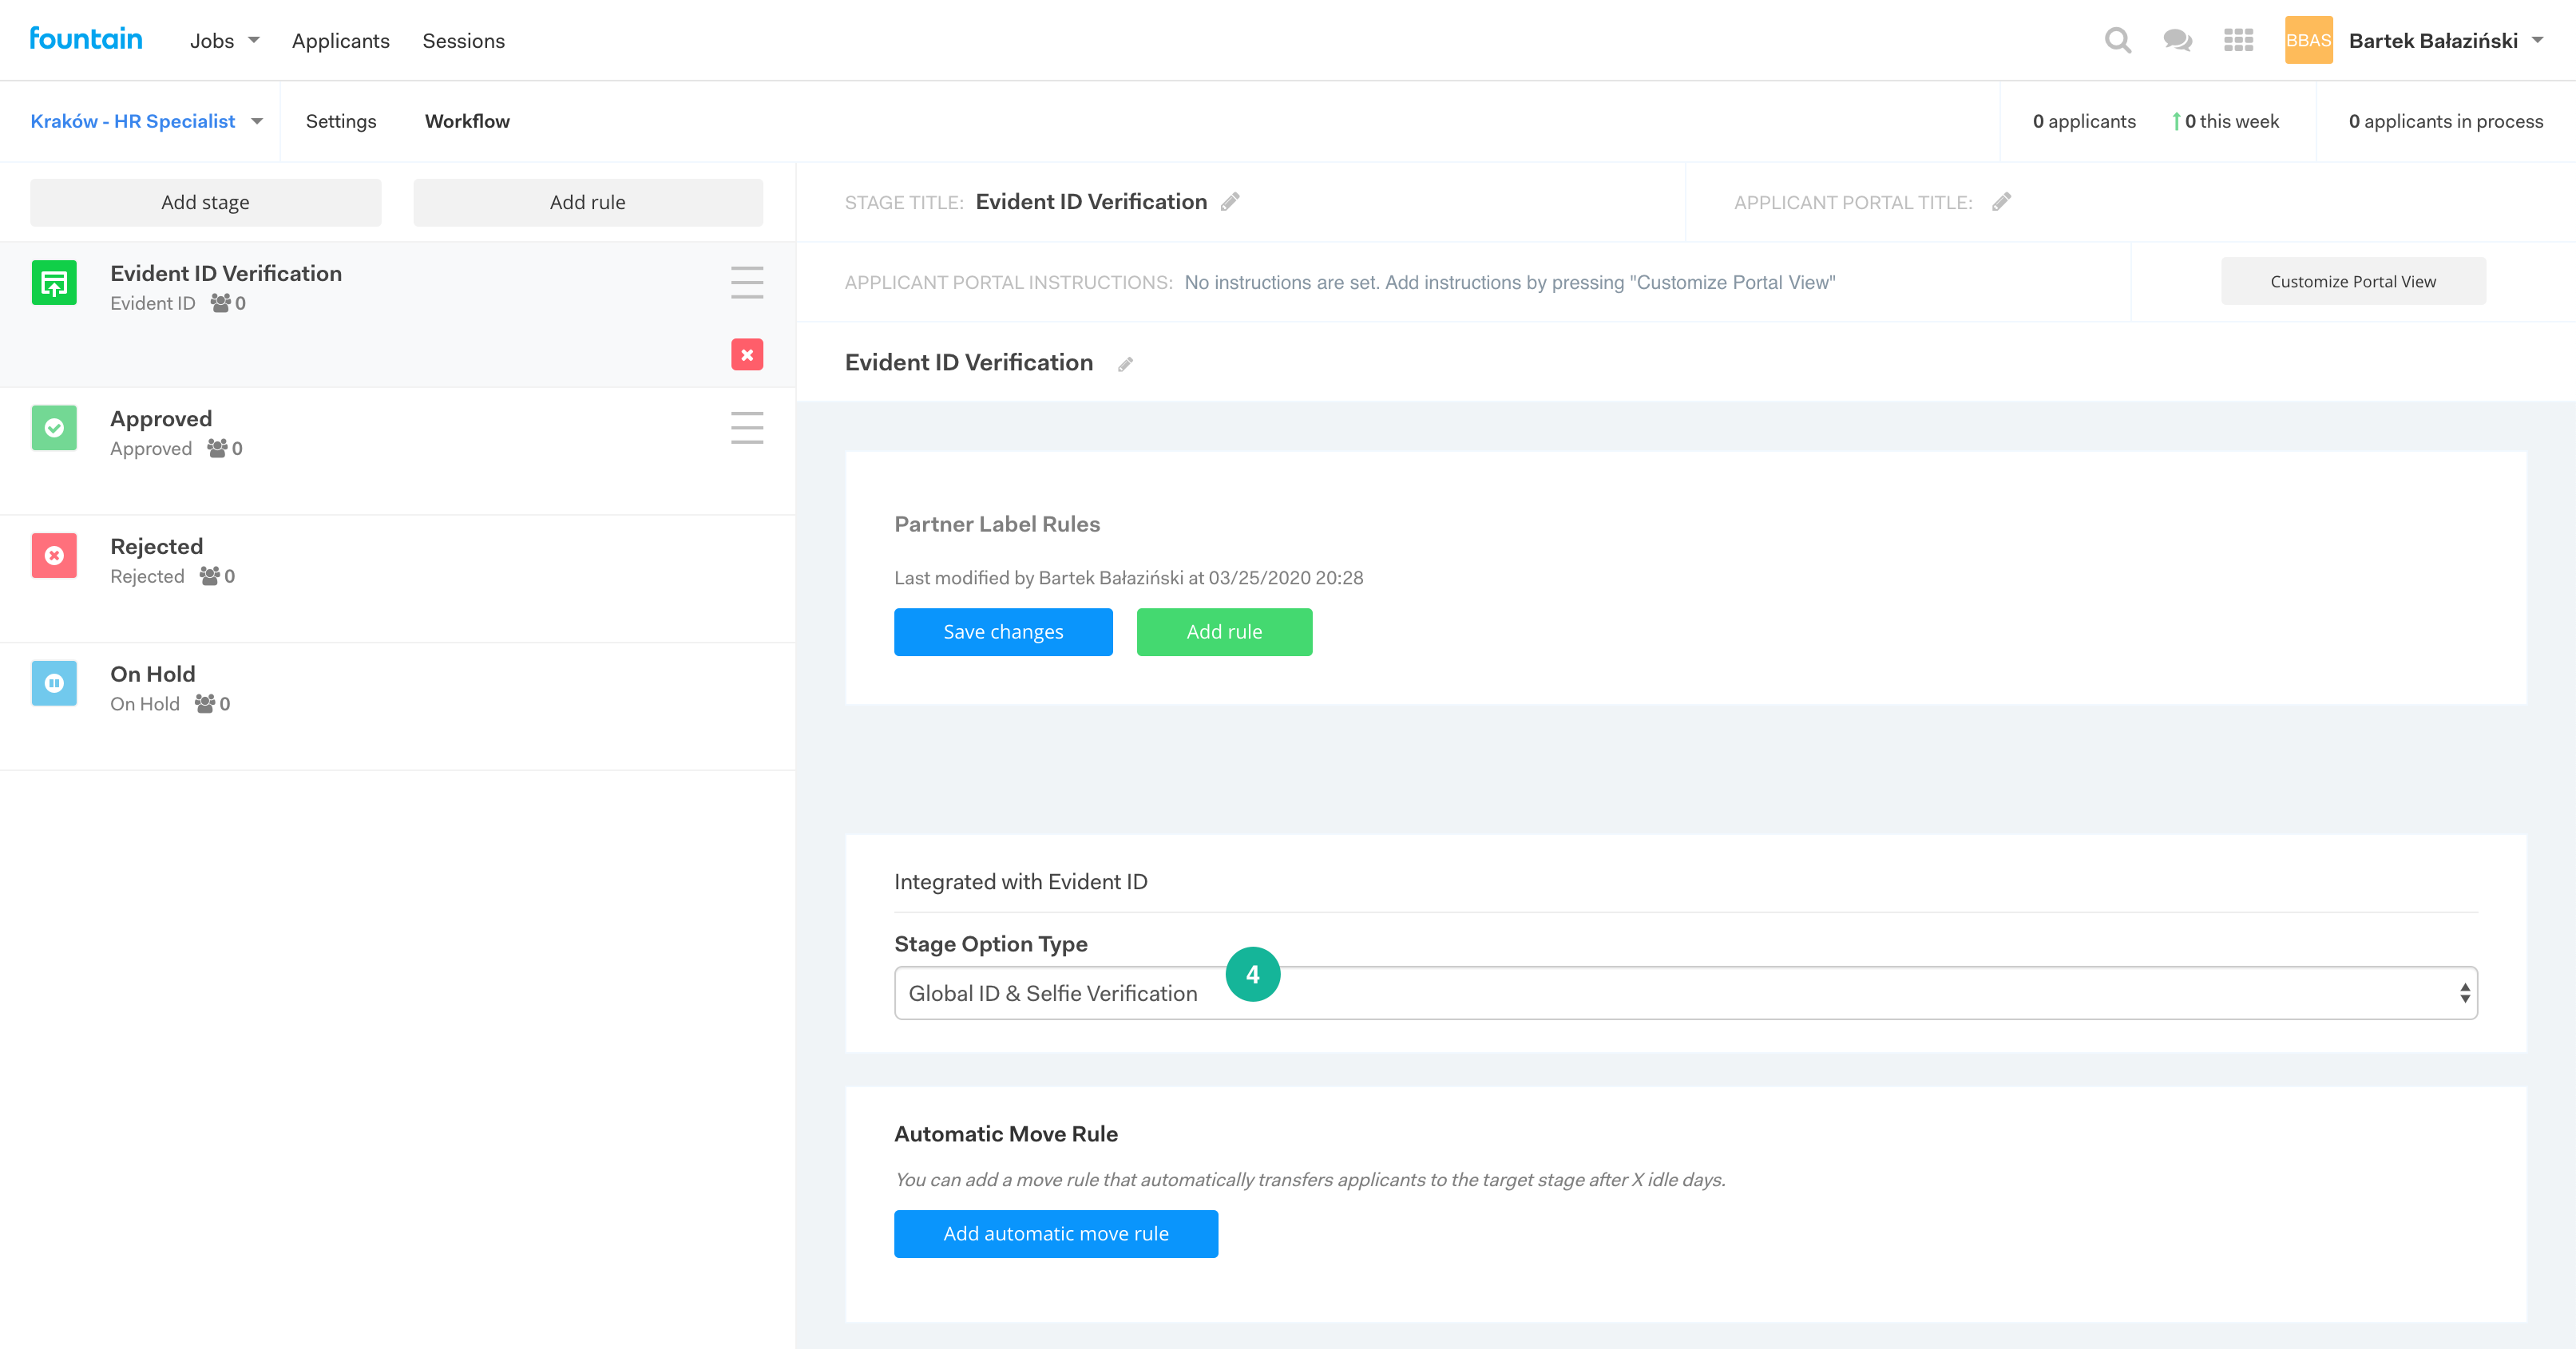
Select the verification type you want to perform in the "Stage Option Type" (4).
All verification types performed by Evident are available in Fountain, so if you can't see what you're looking for please contact your customer success manager to set up the stage option (also known as a "template") for you.
-
Configure the status label rules on the Evident stage
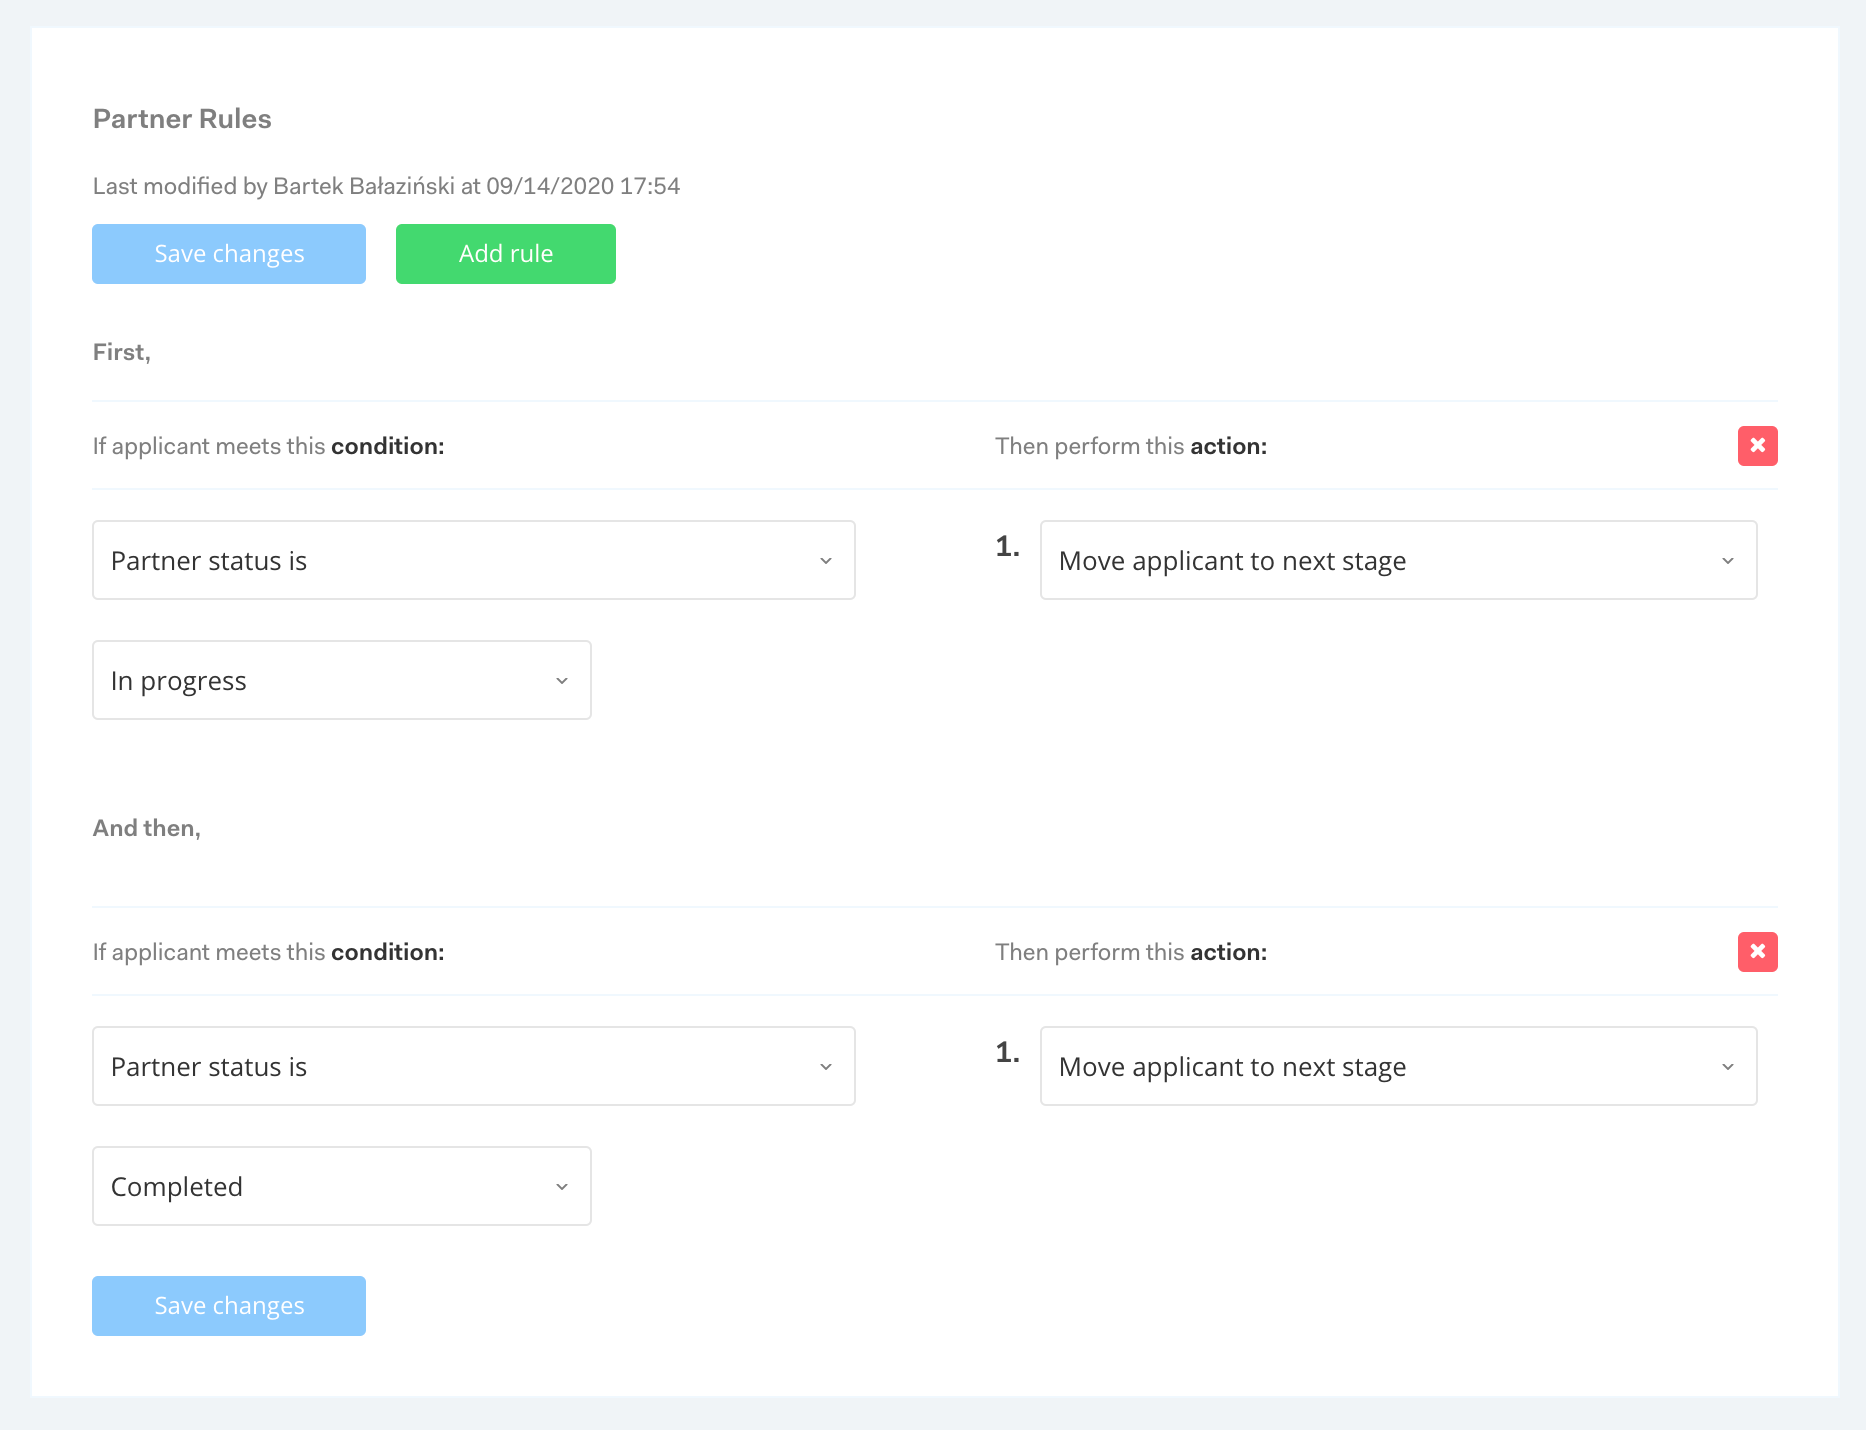
On the Evident stage add a rule that will move the candidate to a decisioning stage if the "Partner status" is "in progress", "completed" or "error" but do not add any rules that act on the verification results. The partner status corresponds to the status webhooks configured above.
-
Submit a test applicant
To use the rules to make decisions about your candidates (see below) you will need to submit a test applicant to Evident and they will need to be verified before the partner detail keys appear in the partner rules drop down menu.
-
Add a decisioning stage
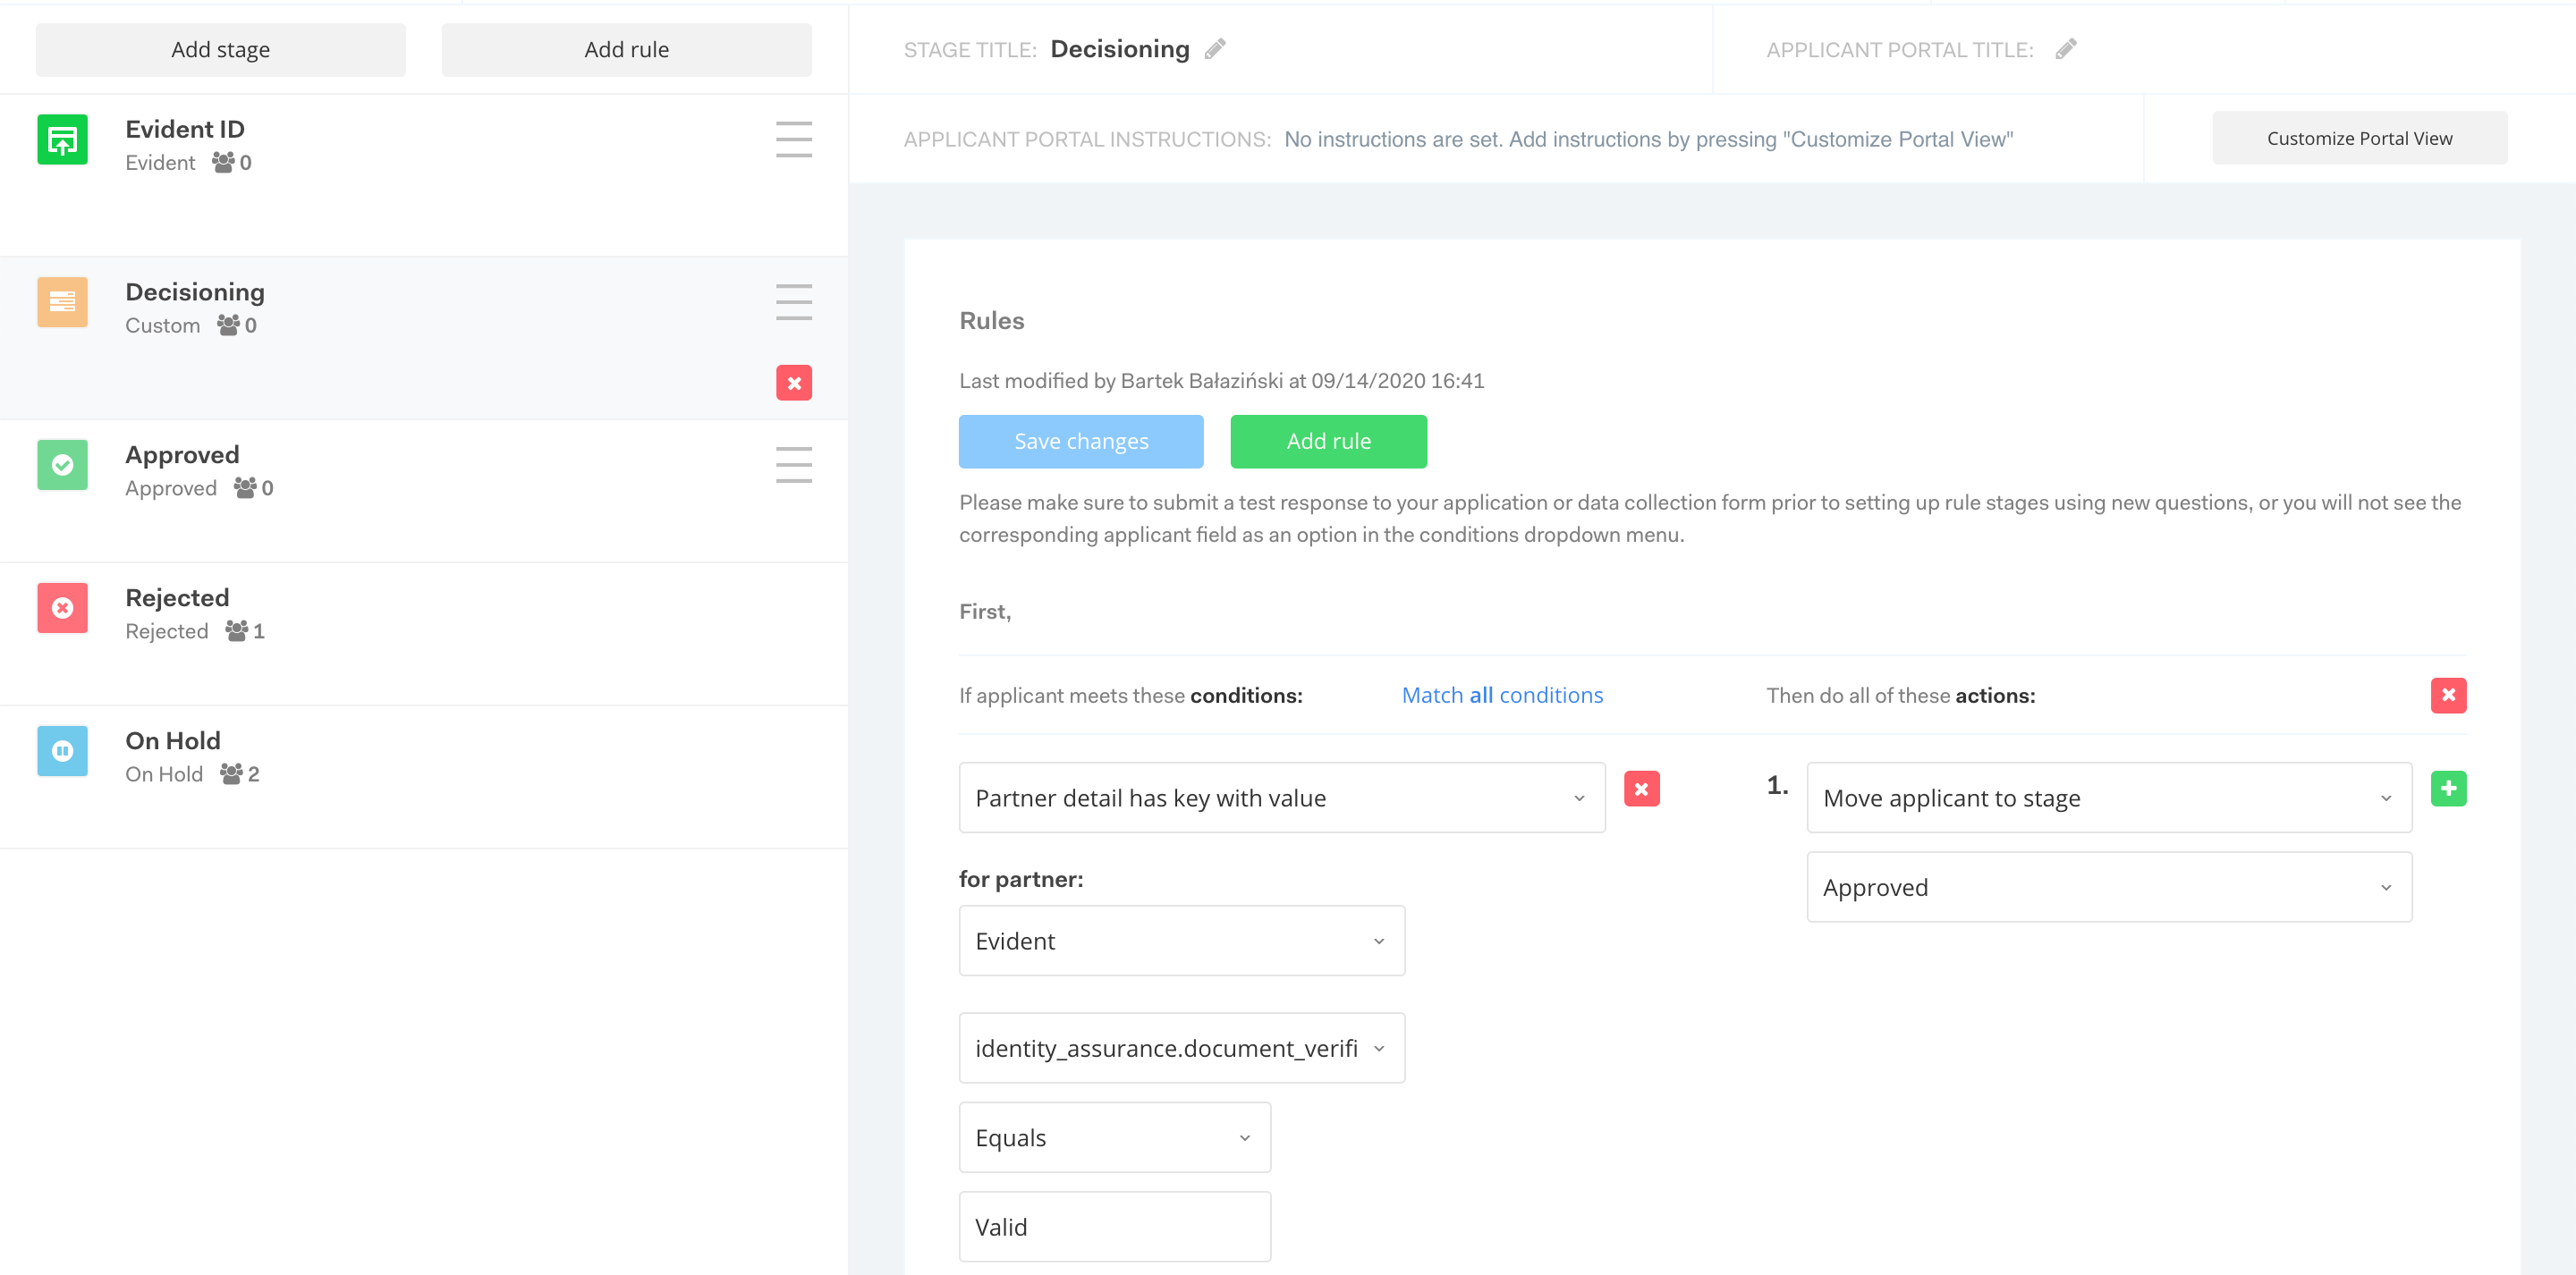
Add a custom stage (see top of this page) to decide who you will accept as a candidate using partner detail rules. Partner details are key/value pairs that correspond to the Evident verification types and their results. To find the most popular partner detail keys and their values please visit the partner details key/value guide.
-
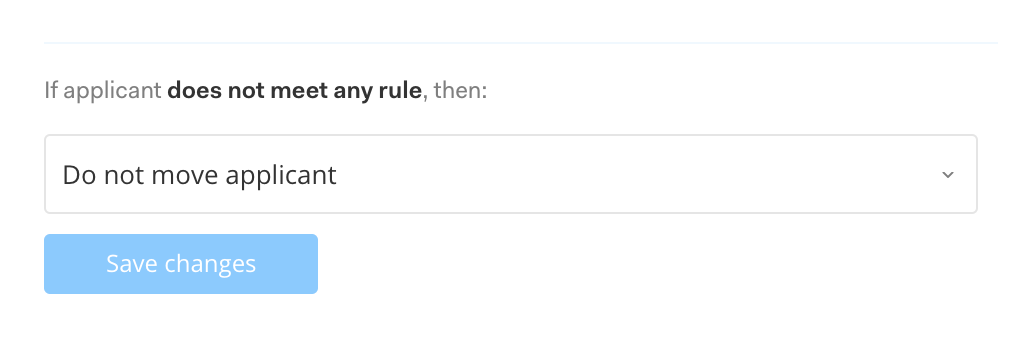
Don't transition applicants without results
Make sure your candidates aren't transitioned if they don't meet any of the rules. This way the decision will be made only when the verification results come back from Evident to Fountain.
-
Customize the holding page
Use the "Customize Portal View" button to modify the page that applicants will see when they land on this stage.
Viewing verification results
If you need to review the results of a verification your can access them in two places:
- on the applicant details view in Fountain
- on the Evident customer portal by searching for the applicant's email address
Please note the results of some data returned by Evident cannot be displayed in Fountain (e.g. selfie, document images) and can only be accessed in the Evident customer portal.